Updates
April 2026 Project Update
Thursday, April 9th, 2026
March Progress (March 1 – March 31st)
March ended up being one of those months where progress wasn’t necessarily flashy, but it was meaningful. A lot of what got done directly improves how usable the van is day-to-day, which honestly feels more important than just checking off build steps.
What Got Done
Bed Platform + Mattress
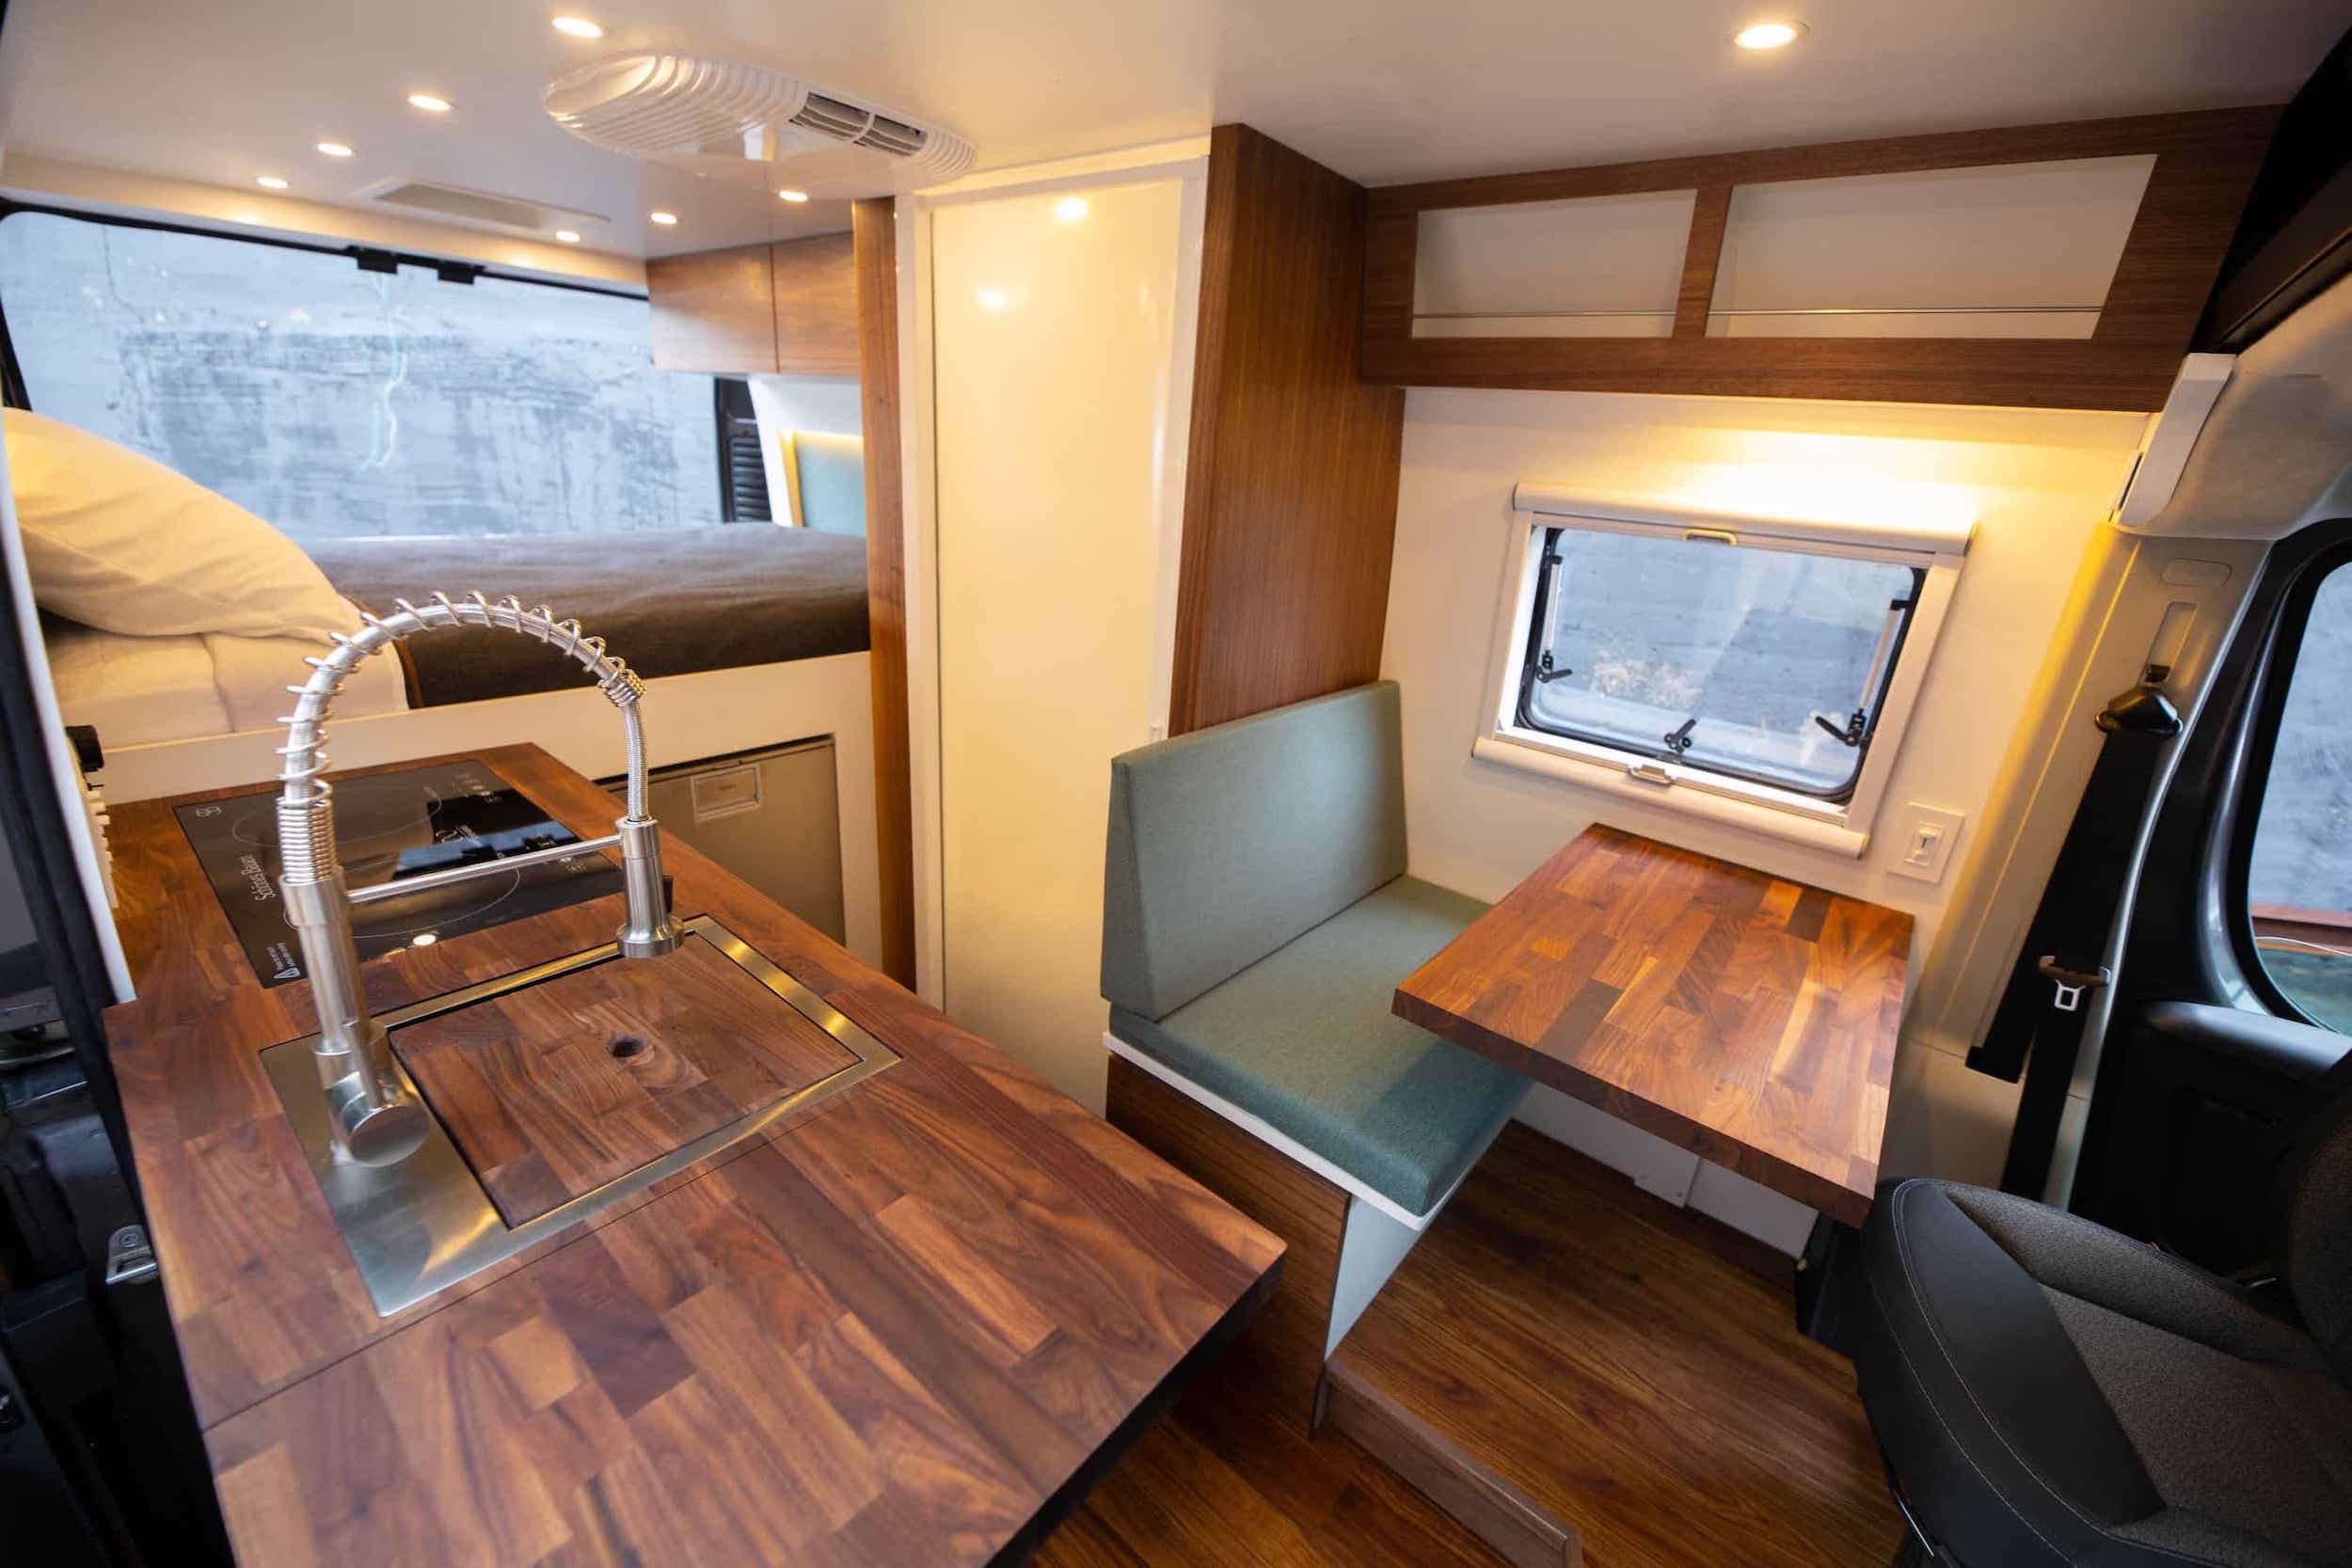
The bed platform is now fully assembled, and the mattress is in.
One change I made here, pretty last minute, was going with a full size bed instead of a twin.
The original plan all along was a twin to save space, but I started thinking more long-term. If I ever rent the van out, most people are going to expect a full size bed. On top of that, it gives flexibility for the future, whether that’s a partner, a dog, or just having extra room to spread out.
It does take up more space, but I think it was the right call overall.
This was also a big turning point in general. The van finally feels like something I can actually live in rather than just a project I’m working on.
Behind-Seat MOLLE Panel
I also installed a MOLLE panel behind the seat along with several pouches.
This has quickly become one of those simple upgrades that makes a big difference. It’s now where I keep all of my day-to-day items—things like a toothbrush, toothpaste, deodorant, extra chargers, and other travel essentials.
Instead of digging through bags or bins, everything is visible and easy to grab. It’s a small quality-of-life improvement, but a really effective one.
I could see myself adding a second MOLLE panel somewhere else in the van eventually once this one fills up.
In Progress / Ongoing Work
Lower Wall Panels (Filler Panels)
I started working through the lower wall gaps using DIYVans ProMaster filler panels.
There are a surprising number of these openings throughout the van, and they’re basically black holes for anything that falls near them. Each one only takes about 4–5 minutes to insulate and patch, but there are enough of them that it adds up.
The goal is to have all of these completed by the end of April.
Walls (On Hold for Now)
One decision I made this month was to hold off on putting up the main wall panels.
Before closing everything up, I want to be 100% certain that I don’t need to run any additional wiring behind them. I’m still considering adding more USB-C outlets and possibly a few additional 120V outlets, and once the walls go up, that becomes a much bigger project to change.
So for now, the walls are paused until I’m confident the electrical layout is finalized.
Kitchen Plans (Now in Motion)
I ordered the first of two lower kitchenette cabinets from Van Wife Components.
I went back and forth on building everything myself, but with time and experience in mind, pre-made van-specific cabinets just made more sense. They’re definitely more expensive, but they should save a lot of time and simplify the process.
The plan:
- Order the second cabinet within the next month or two
- Follow that with a butcher block countertop
This should start turning the van into a much more functional living space.
Power System Note
I ran into an issue with one of the solar input ports on my power station, which I’ve stopped using for now.
I’ve been in contact with Bluetti to get it evaluated, and I’m currently working through their process to determine next steps. In the meantime, the system is still usable through alternator charging, so it’s not a complete setback—just something that needs to be resolved.
Trips This Month
I took a short trip to Omaha, Nebraska, and another to Indianapolis.
One of the biggest takeaways from both trips was how incredibly useful having a fridge in the van is. Being able to keep drinks cold, store food, and save leftovers made a huge difference. It’s one of those things that quickly goes from “nice to have” to essential.
Other Work + To-Do Items
A few additional things on the list right now:
- Sand and paint the upper cabinet
- Cut, paint, and install the lower divider between the garage and living space (under the bed)
- Diagnose and fix the Webasto heater fuel pump issue
None of these are massive projects individually, but together they’ll help clean up and finish out some important areas of the build.
Looking Ahead (April + Early May)
With the weather improving, April should be a much more productive month.
I have:
- A short weekend trip coming up
- A potential 2-day camping trip in May
The goal is to have the van in a fully livable state by that May trip—even if it’s not 100% complete.
That means:
- Bed is done (already there)
- Basic kitchen functionality in place
- Power system reliable
- Storage reasonably organized
It doesn’t need to be perfect... just needs to work.
March was less about big milestones and more about making the van usable in real-world scenarios. Between the bed, storage, and early kitchen progress, it’s starting to feel less like a build and more like something I can rely on. With a couple more key pieces in place, April and May should be where that really starts to show.
February 2026 Project Update
Tuesday, February 24th, 2026
Covering January 1st – February 24th
This update covers progress from the start of the year through today. And to be honest… it’s been slow.
January and February were both extremely busy. Between brutal cold weather and two separate trips (a cruise and Hawaii), the van hasn’t gotten nearly the amount of attention I would’ve liked. That said, progress was made, just not at the pace I had originally hoped for.
Upper Cabinet Installed
The upper cabinet is officially installed.
This wasn’t as straightforward as I expected. It required a few small modifications to both the cabinet itself and the existing furring strips to get everything lined up correctly. Nothing major, just the usual “nothing fits perfectly the first time” type of adjustments.
It hasn’t been painted yet, and likely won’t be until the wall panels are finished — and there’s no hard date for that at the moment. For now, it’s functional, which is what matters.
More Insulation
I added additional insulation in a few areas that needed attention. After my earlier winter test trip, it became very clear that any small gap or thin spot becomes noticeable when temperatures drop.
Cold weather makes weaknesses obvious.
This round wasn’t glamorous work — just filling in areas that needed it — but it should help overall temperature control once the bed platform is in and the interior is more complete.
Furniture Progress (Cut, Not Built)
Most of the wood has now been cut for:
-
The kitchen galley
-
The desk
-
The bench seat
All of the wood for the bed frame has also been cut and is ready to go.
The plan is to assemble the bed frame very early in March. That’s priority number one. Getting off the air mattress permanently will be a massive upgrade — especially before any longer trips.
The Reality of the Last Two Months
Between:
-
Freezing Midwest weather
-
A cruise
-
Hawaii
-
Regular life obligations
…it’s been difficult to stay consistent with build time.
There’s been forward motion, just not momentum.
That’s part of the process though. Not every phase is high output. Sometimes it’s just preparation.
What’s Coming Next
March should bring more visible progress.
Here’s what’s on deck:
-
Additional wood cutting and full assembly of the bench seat and kitchen galley
-
Assembly of the bed frame
-
Installing a MOLLE wall and adding additional storage solutions
-
Preparing the van for a potential long-distance trip at the end of March
-
A San Francisco trip in early April (still undecided whether that will be flying or driving)
The goal over the next few weeks is simple: turn all the cut wood into actual structure.
Once the bed is built and the core furniture is in, the van will start feeling less like a project and more like something usable.
That's all for now.
PS: I know I haven't posted any update photos, mostly due to slow progress, but the next update post will have a few...
Barebones Camping Trial Run
Tuesday, January 20th, 2026
A few weeks ago, I hit the road for a 5-day “camping” trip through Kentucky, Tennessee, and North Carolina. The whole point wasn’t to take a vacation or go sightseeing — it was to test what I’d built so far in the van and figure out what still needed work before I commit to full-time travel. Just a dry run, stripped down to the basics.
Before we dive into the day-by-day, here’s what the van had installed at the time:
That’s about as barebones as it gets. But that’s what made it fun.
Day 1 – A Soft Start
The trip kicked off with a four-hour drive to a friend’s place near Louisville, KY. He’s building out a van too (a Ford Econoline) and is right around the same stage as me, so we planned to tackle this trial run together.
Instead of hitting the road right away, we decided to camp outside his house that first night, just in case something went terribly wrong. I’d already been driving for a few hours, so saving the long drive for Day 2 made sense.
For sleeping, I used my inflatable air mattress with a comforter and light blanket. I also had the Webasto heater running for part of the night... which, by the way, is excellent at heating the space, but I quickly learned two important lessons: heat rises, and the floor gets cold. With the mattress directly on the floor, I froze. Add to that the fact that the mattress slowly deflated overnight… not ideal. By the next day, I’d already decided to stop inflating it entirely. More on that in a bit.
Day 2 – Getting Moving
We had a warm breakfast inside, said our goodbyes, and then hit the road toward Cumberland Gap National Park. We booked a spot at Wilderness Road Campground for our first real night of camping — partly to ease into things and partly to have access to showers and emergency power if needed. We stopped at Walmart along the way to grab groceries and supplies for a few days of cooking. This is exactly why I wanted the fridge installed before this trip — to avoid relying on takeout. When we arrived, we found our assigned campsites and started getting set up. I didn’t bother plugging into the power hookups until morning since my battery system was still mostly full. Dinner didn’t exactly go as planned (missing a few key supplies), but we made do. Then we made hot chocolate, climbed into my van, and watched YouTube for a while to wind down.
That night, I made some changes to my bed setup. I folded up extra insulation I had brought (originally intended to separate the cab from the living space) and placed it under the deflated air mattress to create a barrier between me and the cold floor. On top of the mattress, I added a foam topper I picked up at Walmart. Then came the sheets. It worked — the floor wasn’t nearly as harsh, and the comfort level improved drastically.
Pictured: Great Smokey Mountains Overlook
Day 3 – A Taste of VanLife
The next morning we used the campground showers, packed up, and hit the road again. We stopped at a Waffle House for breakfast — good food, good people, and overall good vibes.
Our next destination was Asheville, North Carolina. I have a couple of friends who moved there earlier this year, so this was a chance to visit. It was a 3–4 hour drive, with some really scenic stops along the way — overlooks near Cumberland Gap and the Smoky Mountains, both with incredible views.
We made it to Asheville in the early afternoon and hung out at a Walmart for a bit to kill time before dinner. That didn’t last long — security came by within 45 minutes asking us to move. We weren’t planning on staying the night, but it still cut our break short. Dinner with my friend was worth the drive. He suggested a Planet Fitness where lots of VanLifers tend to stay overnight — a spot where nobody gets hassled. So, that’s where we headed. Once parked, we each did our own thing for the evening to avoid attracting attention or bothering anyone. It was a cold night, and while I tried to avoid using the Webasto heater (it’s loud — like obnoxiously loud), I ended up needing it eventually.
Day 4 – Gatlinburg and a Cracker Barrel Camp
Waking up in that Planet Fitness parking lot, I overheard my friend talking with a guy who had just pulled up. He was working on his own van build and planning to hit the road soon. It was a cool reminder of just how many people are out there doing the same thing — or at least dreaming about it.
After breakfast (eggs and bacon cooked in the van), we hit the road again with no real destination. We figured we’d check out Gatlinburg, TN, which took us through some winding back roads and steep hills the van wasn’t exactly thrilled about. Gatlinburg itself was fun. We wandered through shops, went on some sky lift thing, and even ended up on someone’s TikTok LIVE stream.
We decided to spend the night at a Cracker Barrel in Rocky Top, TN — a popular option among RVers. We asked for permission, got the okay, and parked out back. Since we got there just before closing, we didn’t get dinner, but we did cook steak in the van and planned to eat breakfast there in the morning. Cracker Barrel is well-known for welcoming overnight stays, just make sure to call ahead, since policies can change based on city ordinances. It's also common practice to eat there as a thank you.
Day 5 – Spontaneity and Splitting Up
After a hearty breakfast at Cracker Barrel, we originally planned to head west toward Nashville. But as with all good VanLife stories, plans changed. We decided instead to go north toward Lexington, KY.
I messaged another friend and set up a quick visit while Ethan planned to see one of his own. We arrived around noon and hung out at various shops around town. Ethan and I decided to part ways a this point. The friend I met up in Lexington with joined me while I headed north and spent the night at a Love’s truck stop in Memphis, Indiana.
Day 6 – Homeward Bound
By the time I woke up, my friend had already hit the road for work. I left the truck stop and started the final stretch home.
What I Learned (and What’s Next)
This trip was never about sightseeing. It was about learning — what works, what doesn’t, and what I still need.
Here’s what stood out:
Sleeping off the ground is a must. Cold air radiates through the floor. Once I have the bed platform installed with a real mattress, things will improve drastically.
Not knowing where you’re sleeping each night is stressful, especially in unfamiliar areas. I was lucky to be in the Midwest where options are a bit more forgiving.
Gas adds up fast. I expected it, but seeing how quickly the cost grows — especially when moving around every day — was eye-opening.
The loneliness part is real. Even though I was only gone for a few days and had a friend with me, I can already tell this will be one of the harder parts of full-time travel.
So what’s next?
The bed platform is top priority before the next trip (planned for February).
A desk setup is another must-have. I didn’t mention it earlier, but using a lawn chair with a laptop was less than ideal. I need a real workspace in the van.
Overall, I’m excited. This trial run confirmed a lot, both about the van and about myself. VanLife is challenging, but it’s also freeing, spontaneous, and incredibly rewarding. If anything, this trip made me even more excited for the road ahead.
The next post will cover the February/March/April route plans
January 2026 Project Update
Tuesday, January 6th, 2026
Covering van progress from December 1st to December 31st
This month’s update is a short one (due to the holidays, the extreme temps, and the short weekend trip, very little work was completed), but a few key changes happened that pushed the build forward — and gave me a much better feel for what living in the van will actually be like.
Webasto Heater Installed
Very early in December, I installed the Webasto gasoline heater. The install took about 6–7 hours of solo work, and while it was a bit of a project, it was absolutely worth it. This thing is a game changer. It pulls just 0.04–0.06 gallons per hour directly from the van’s fuel tank, and makes the space tolerable on freezing cold nights. I’ll be doing a deeper dive into this in a future post.
Fridge Installed
The Dometic fridge arrived shortly after, and I had it installed in the van that same day. It’s incredibly spacious and will be a huge asset for longer trips. For now, it’s running through the DC fuse block connected to the Apex — no issues there so far.
Power System Setback
I ran into an issue with the XT60 port on the Bluetti Apex 300. Due to what I’ll fully admit was user error, the port looks like it overheated — possibly because the adapter I used wasn’t rated to handle the full power from the solar panels. It’s not a total system failure, but it does mean I can’t use that port anymore. This may push me to move toward a custom Victron power system sooner than I planned.
What’s Coming Next
I’ll be picking up several sheets of baltic birch plywood early January to start framing out the bench seat, kitchenette, and desk support structure. These will be the first major furniture builds and should help define the layout moving forward.
PS: on deck is the first long-distance road trip update. Stay tuned for that and other exciting updates coming very soon...
2025: A Recap
Tuesday, December 30th, 2025
It’s hard to believe that just a year ago, VanLife was still just an idea — a dream I wasn’t quite sure I’d be able to pull off. At the start of 2025, I knew the journey ahead would be intense: a mix of financial strategy, personal changes, and a lot of unknowns. But looking back, the progress made this year feels surreal.
The Year It All Started
January kicked things off with a big milestone — I paid off my daily driver, the Malibu. That decision wasn’t just about getting rid of a car note; it was about clearing the path for what would come next. With that out of the way, I immediately started saving for a van. At the time, I had my sights set on a used ProMaster — something with 20–25k miles, hopefully in the $29–32k range.
But the more I searched, the more I realized that a used van wasn’t necessarily the better deal. In April, I started seriously shopping, and by May I found one that checked nearly every box.
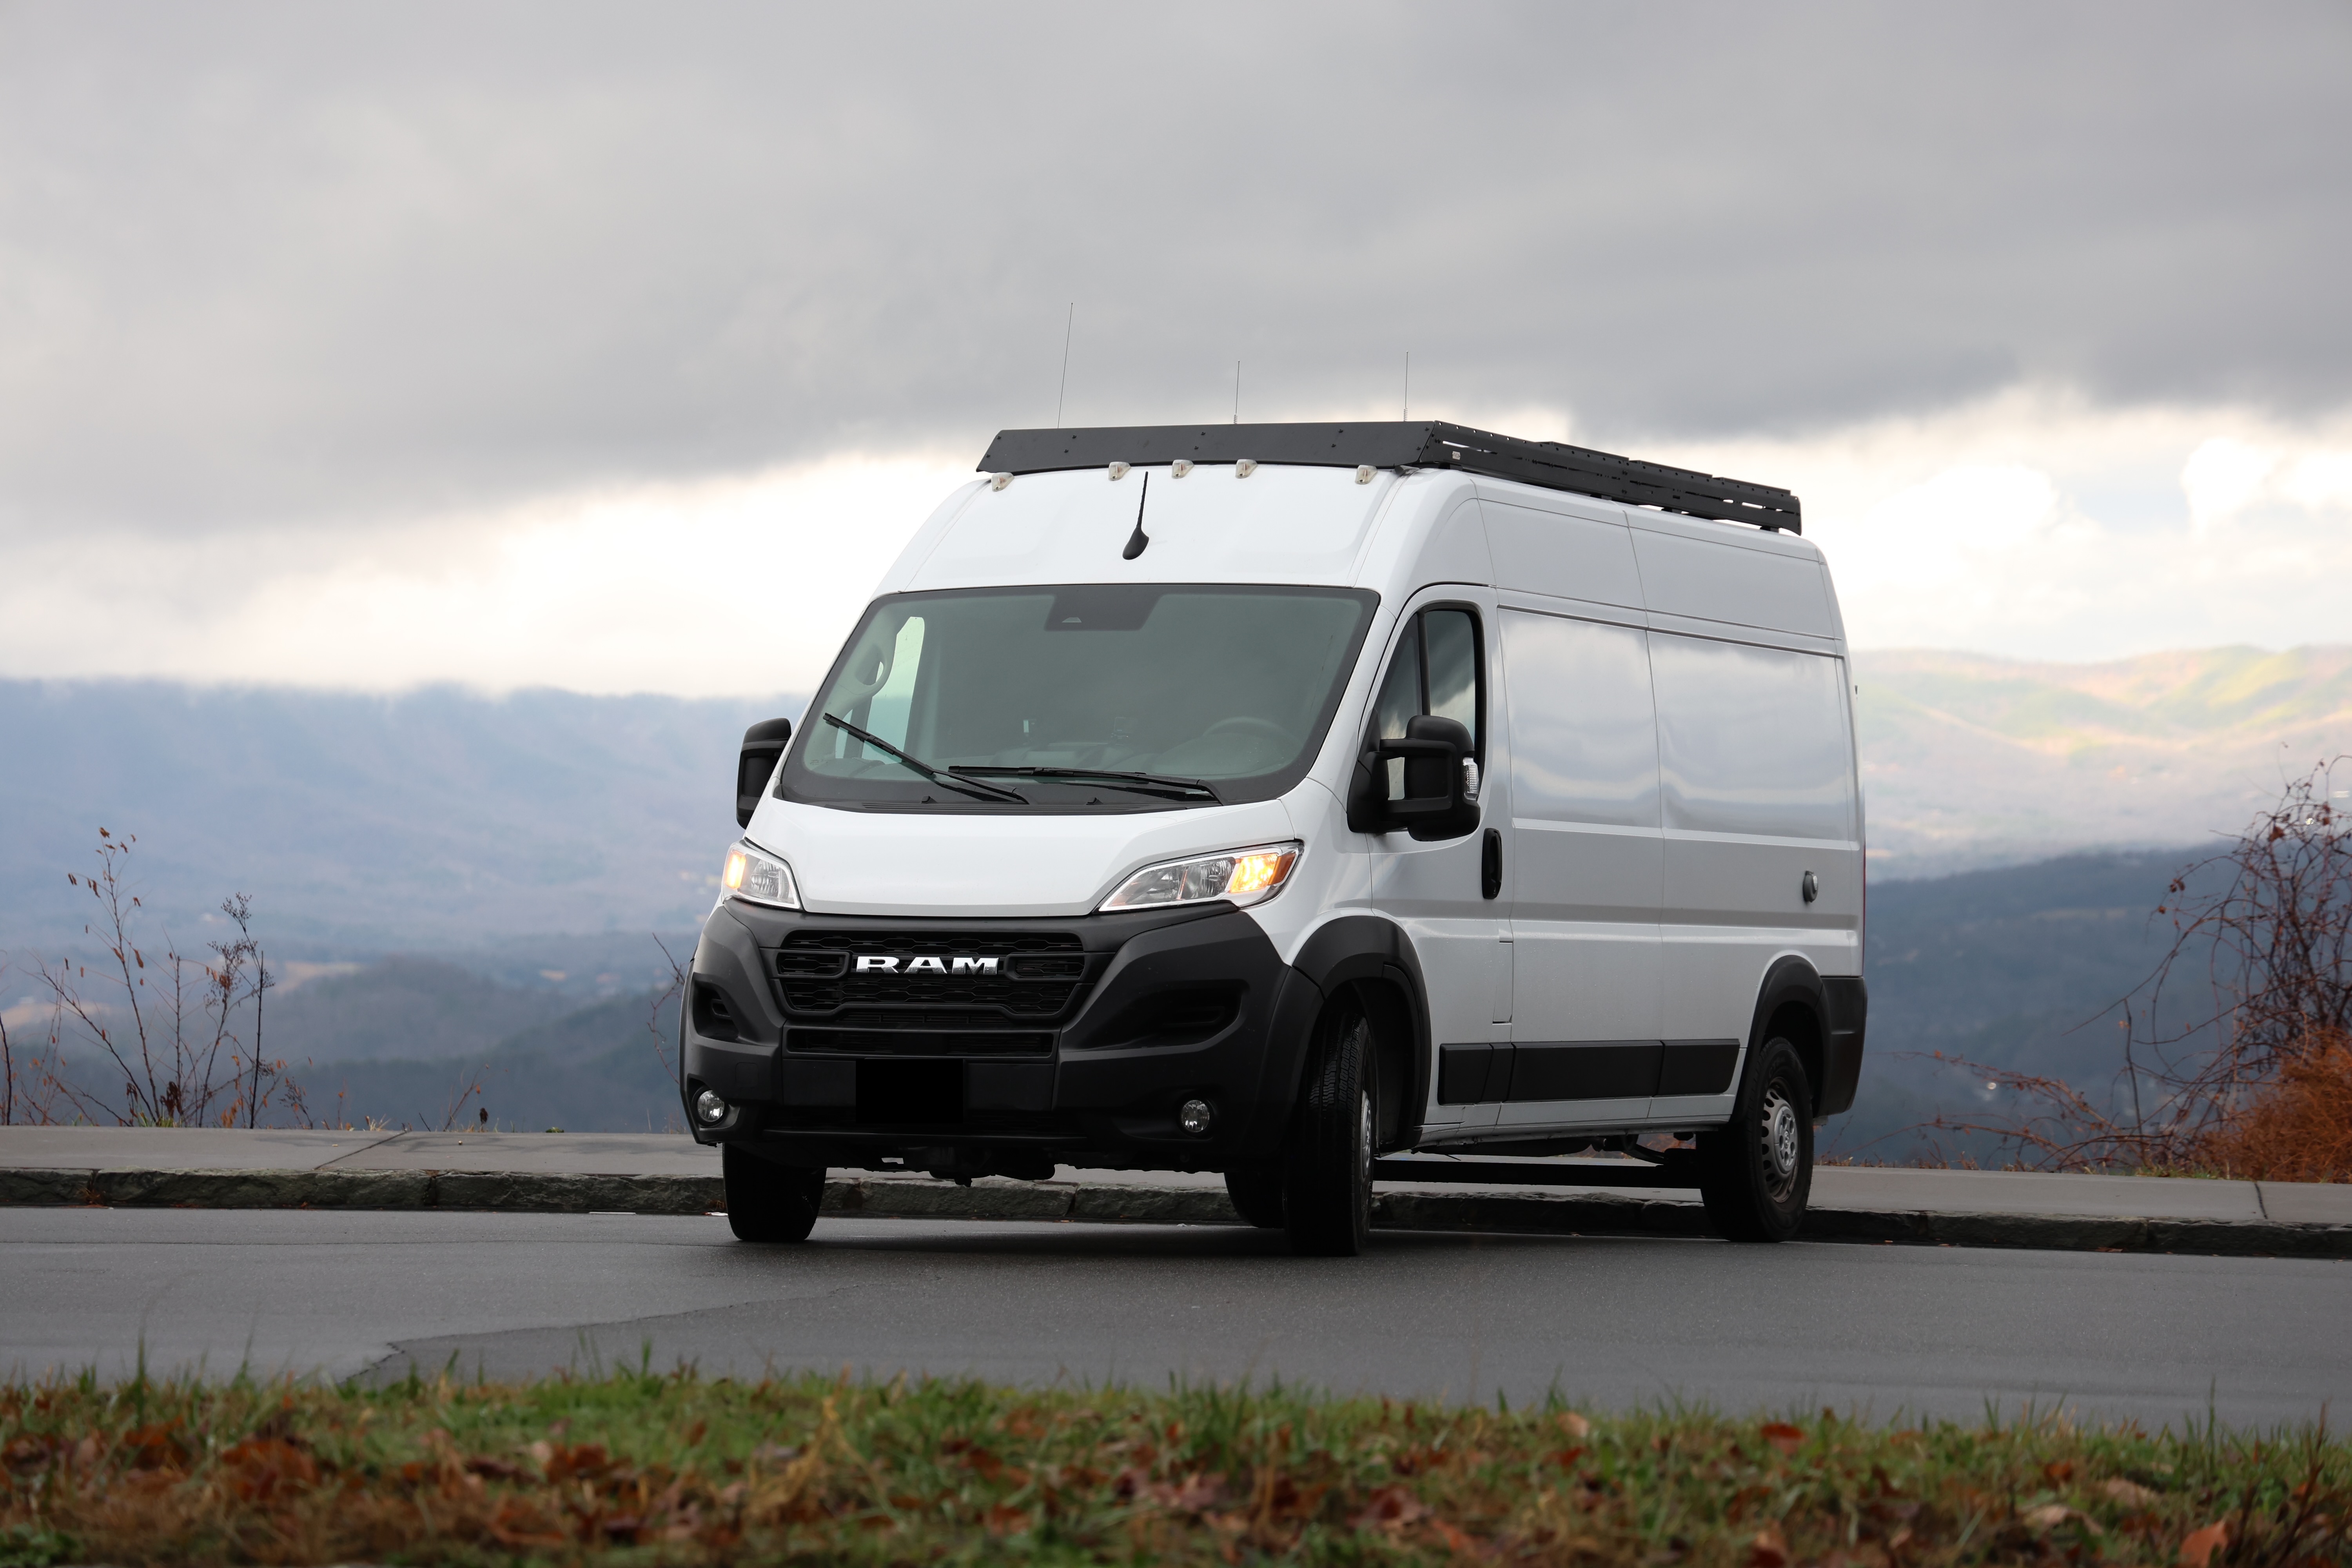
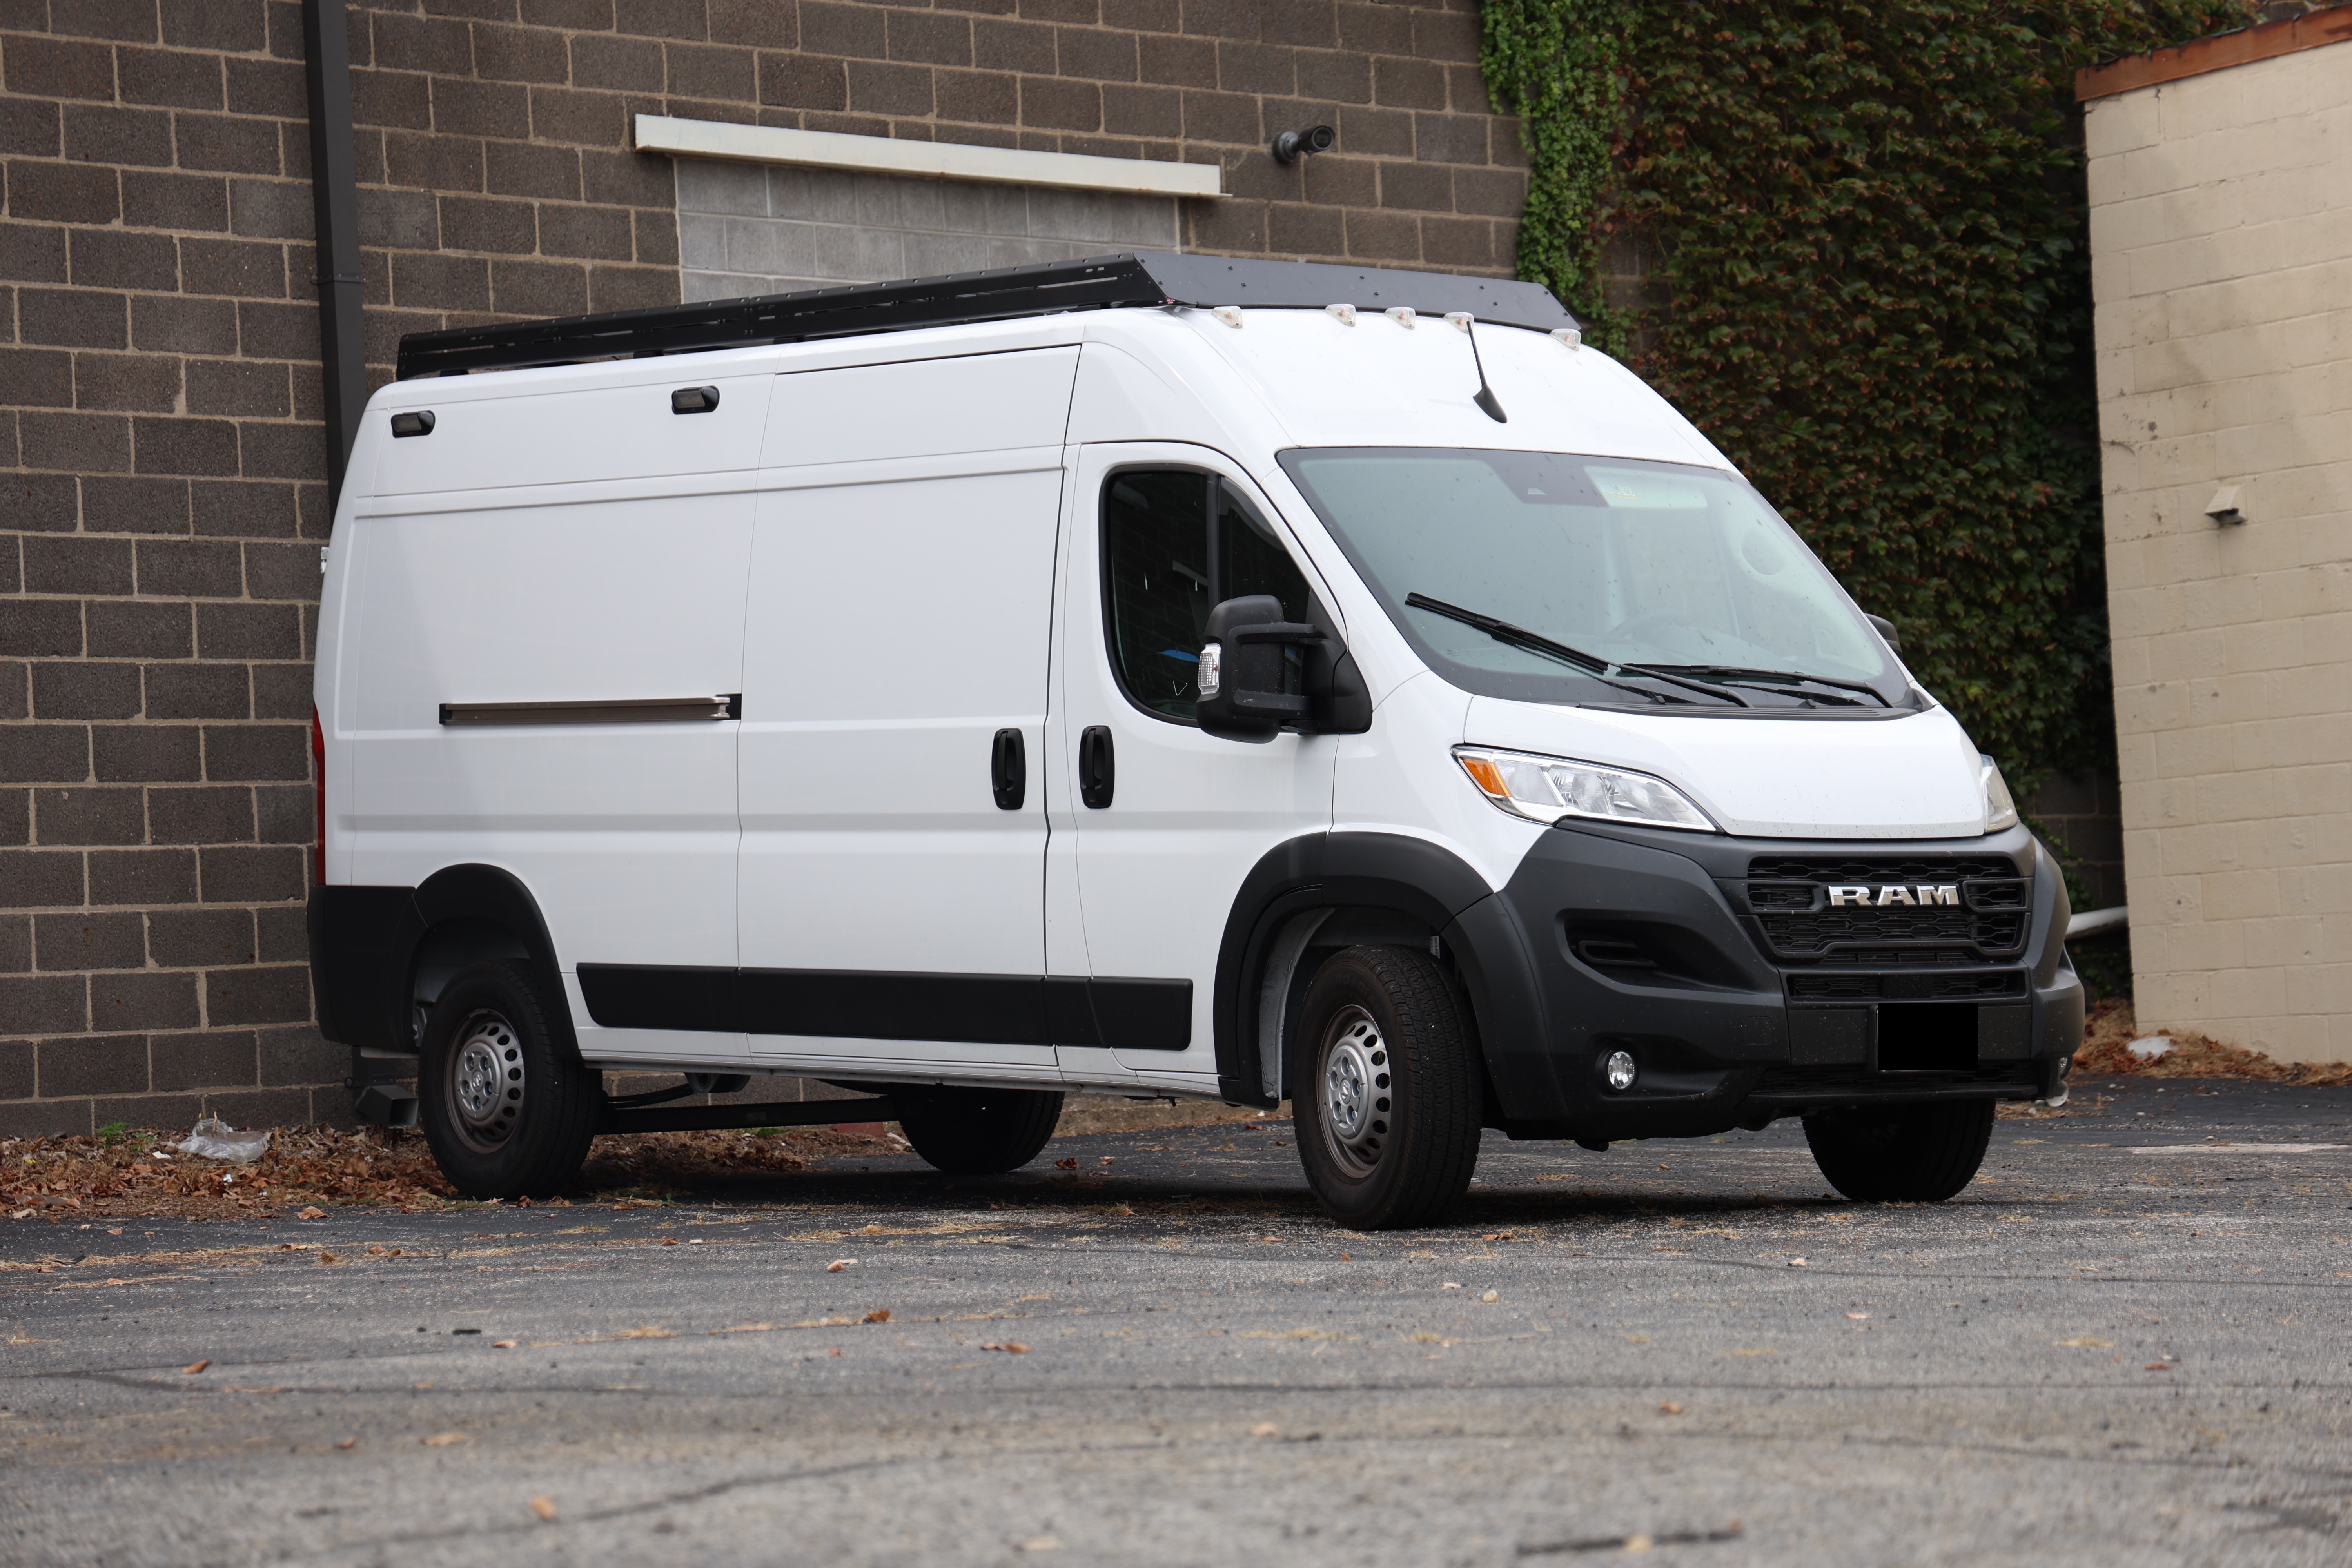
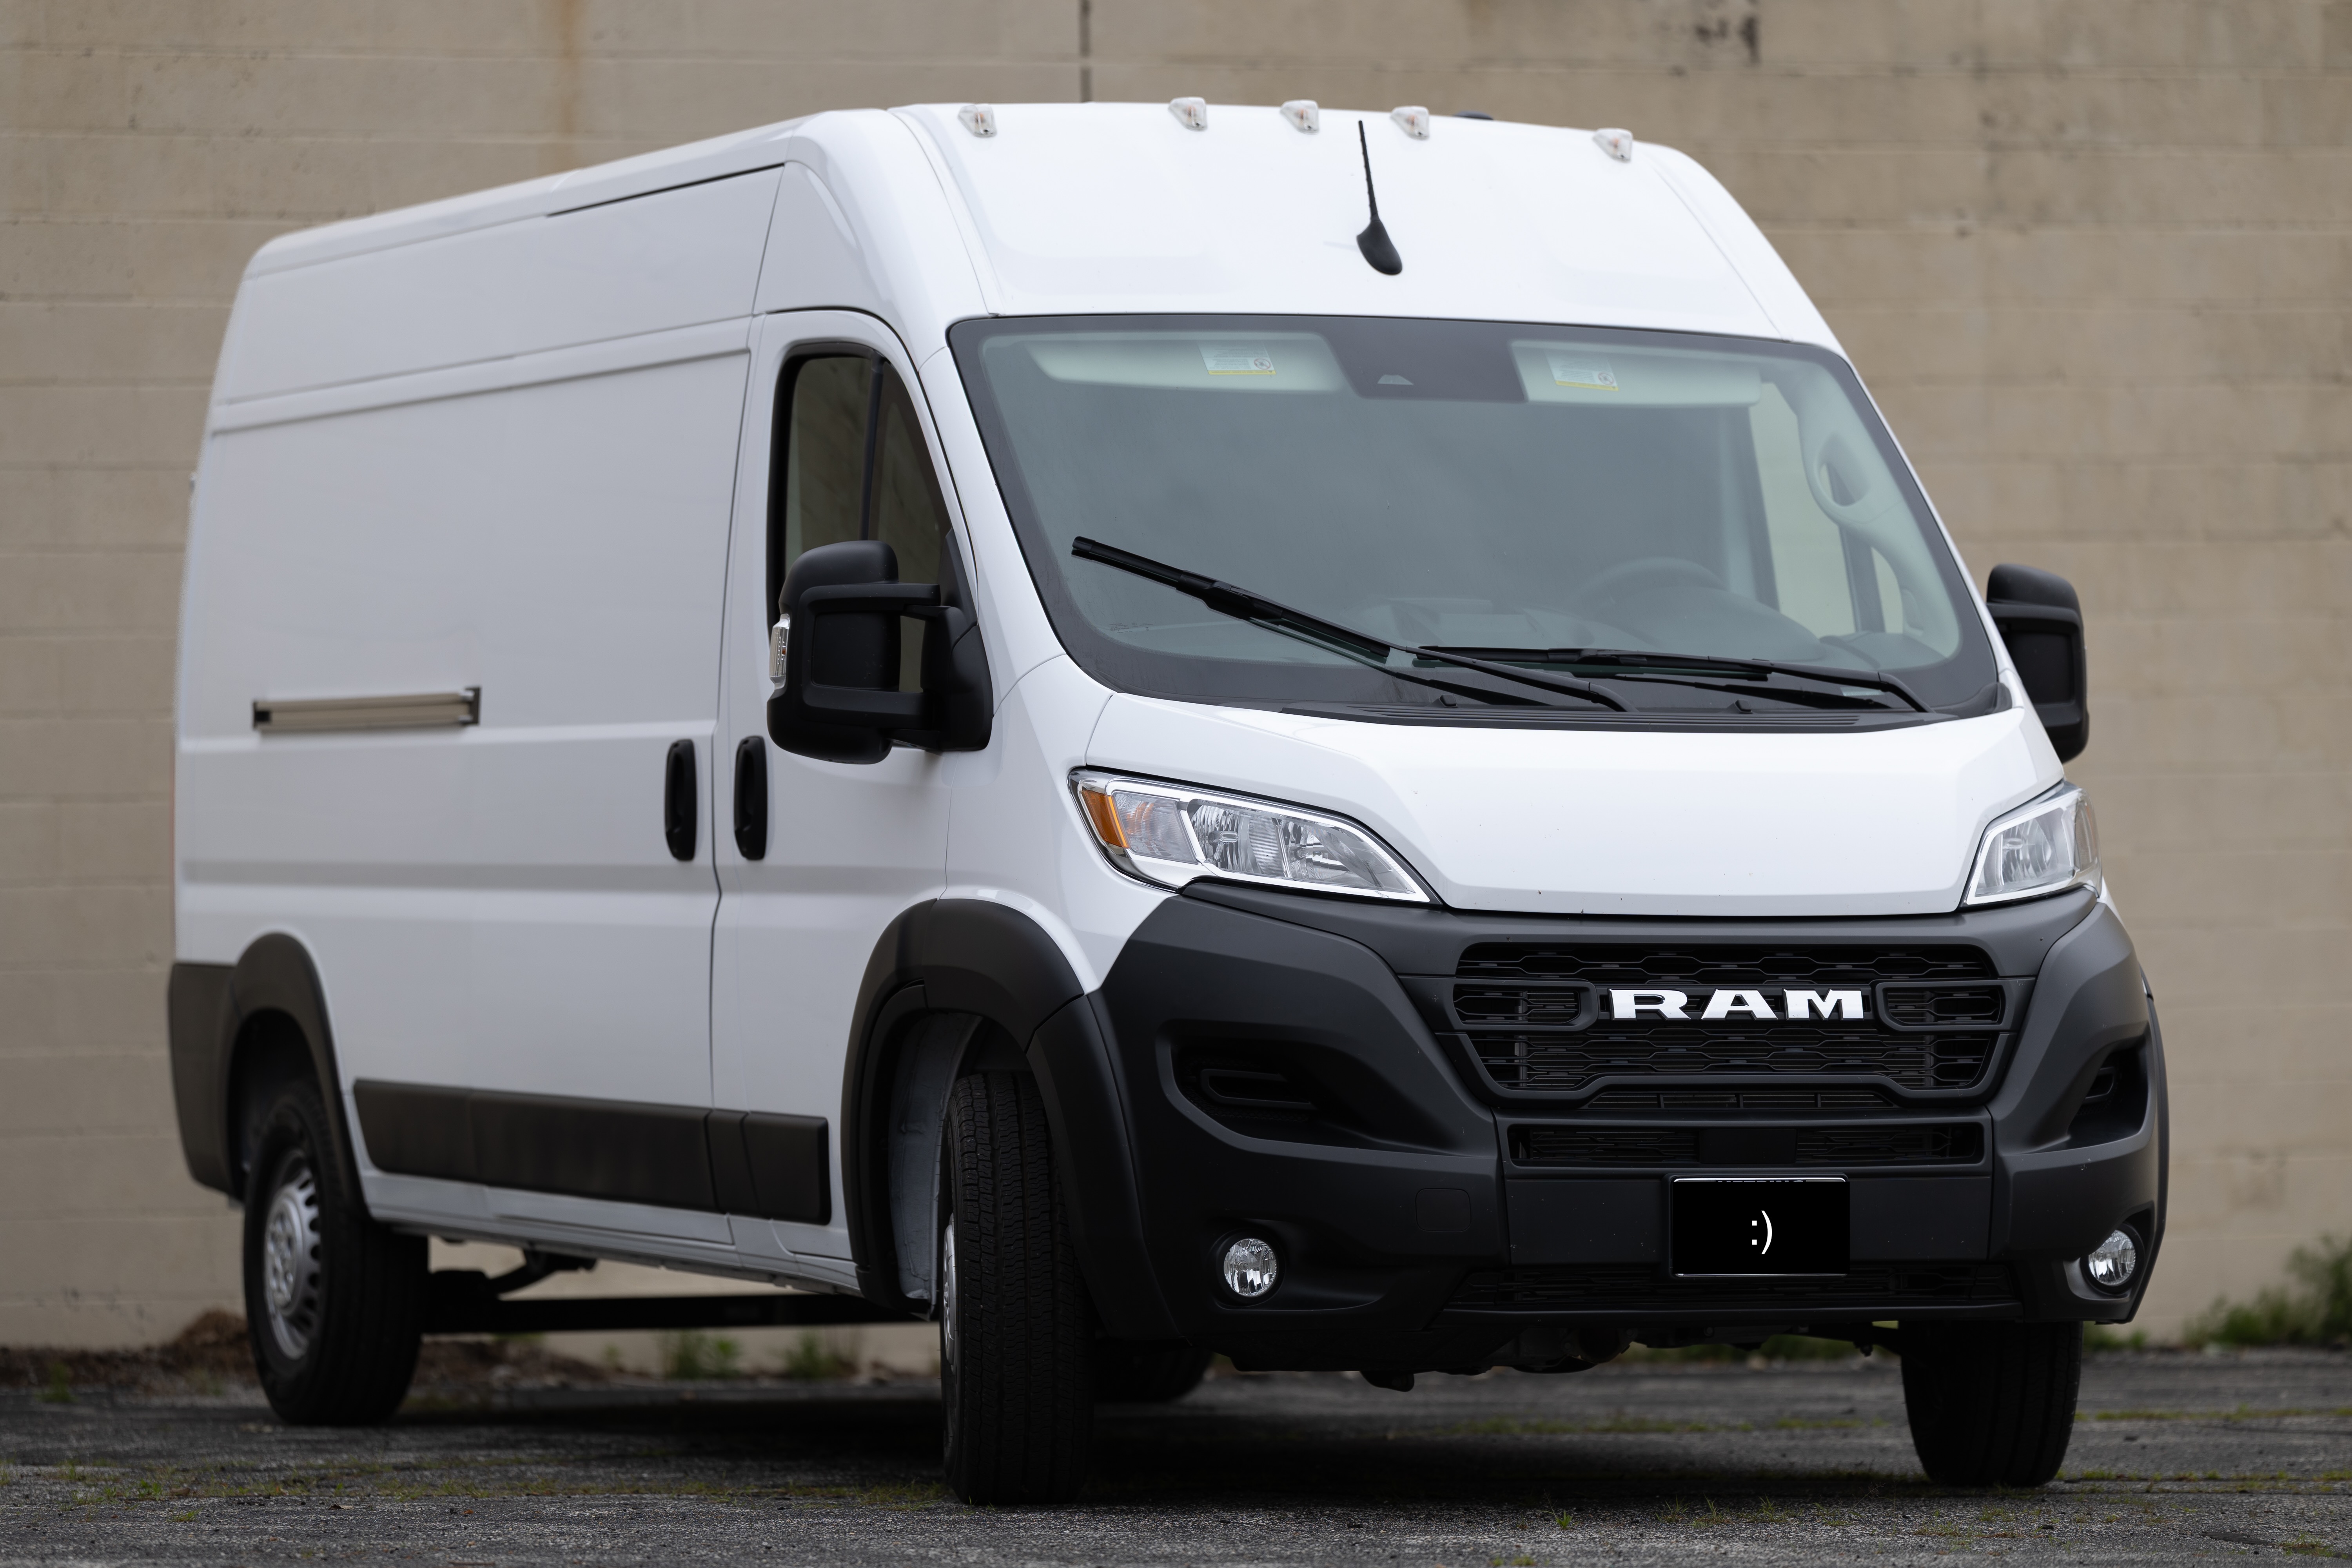
On May 23rd, I bought a brand new 2024 Ram ProMaster 159” High Roof, right off the lot with just 150 miles on it. It was a massive step forward.
Building a Home on Wheels
The build began slowly. I started at the end of June, knocking out the roof fan install. From there, July brought bigger pieces: the roof rack, solar, AC, and a portion of the subfloor. At this point, things were still very rough. I had some of the core components, but nothing inside the van felt livable yet.
The real momentum came in October and November. That’s when most of the foundational work started taking shape: the subfloor and LVP flooring went in, the Bluetti power station was mounted and tested, wire runs were finalized, and most of the initial framing got underway.
Each weekend became another step toward turning an empty van into something that resembled a tiny home.
A Test Drive
In early December, I took the van on its first real trip. It wasn’t finished — not even close — but that was the point. I hit the road for five days across Kentucky, Tennessee, and North Carolina with a friend who’s building out a similar setup. The goal was to test what worked, find what didn’t, and figure out what I really needed to live comfortably.
I’ll have a full post about that trip in early January, but in short: it was cold, imperfect, and exactly what I needed. Sleeping on an air mattress, cooking on a portable stove, and relying on the barebones build gave me clarity that no blueprint or YouTube video could.
Looking Ahead to 2026
The journey is far from over. In fact, the real adventure hasn’t even started yet. Here’s what’s coming:
-
January/February: I’ll be finishing up the core interior — a proper bed platform, storage, and at least the basics of a desk setup.
-
February into March: I’ll be heading back out on the road for another test trip, this time to Florida, and possibly beyond. It’ll be longer, warmer, and hopefully much more refined.
-
Power Upgrades: At some point in 2026, I’ll be swapping out the Bluetti system for a full Victron-based custom power setup. It won’t be immediate, but it’s a key piece of the long-term puzzle.
-
Hardware Upgrades: Early 2026 I'll be swapping for new all-terrain tires, adding a rear tire carrier, and side steps — along with a few other functional upgrades that will make life on the road smoother.
As I close out this year, I can confidently say that 2025 was the start of something much bigger. The first page has been written. And while the van isn’t finished yet, the foundation is there.
Here’s to the next chapter.
December Project Update
Tuesday, December 2nd, 2025
This post covers all van build progress and changes from November 1st to 30th.
Back in October I mentioned that November would be a pretty busy month for me. As it turns out (without getting too far into the details), I had quite a bit of time free up unexpectedly. Admittedly though, I didn't use this time how I should've, which led to less progress than I'd like. That said, I still made a decent bit of progress compared to October.
What I Planned to Finish This Month
From the last update:
Finish the furring strips
Install LVP flooring (already ordered)
Mount wall panels
Connect all wiring to a 12V fuse block powered by the Apex 300
Furring Strips
Significant progress was made here. All horizontal strips, most vertical strips, and most of the ceiling strips have been installed. The remaining vertical strips will be done later on (once furniture locations are finalized). The remaining ceiling strips require a bit more work but should be done very soon.
Flooring Update
The LVP flooring has officially been installed, and it looks awesome. This was the first visual element that really made the van start to feel "real."
Took about 3-4 hours total
Day 1: Installed most of the floor
Day 2: Used the Mopar floor mat to cut the front section, then refined it
Flooring ends at the start of the rear wheel wells to protect against damage in the garage area
I also installed a stair corner trim piece at the sliding door, which hides the exposed subfloor and flooring edge.
Wall Panels
I initially stained some wood panels but wasn’t happy with the result, so I scrapped them. After testing a new stain (dark walnut gloss), I found one I actually like. I’ll use this when I decide to install the wall panels down the road.
Wiring and Cable Management
I made solid progress here:
Maxxfan, exterior lights + switch, and 1 USB-C port are wired
All connected to a Blue Sea Systems DC fuse block and busbar
These will be built into cabinets later, but for now, everything is functional
Passenger side wiring will be done soon.
Insulation Update
Even though the van was already insulated, a stealth camping trip revealed how cold it gets at night. I decided to double insulate:
Ordered another roll of Thinsulate (20 feet)
Stuffed into corners and areas often overlooked
Still need to insulate some large patches once vertical furring strips are finished
OEM Ceiling Light Removed
The factory ceiling light is finally gone, as it was in the way of insulation and furring strips. I’m now using a photography/filmmaking light as a work light.
Overhead Cabinets
I ordered an overhead cabinet from Timber. It's fully assembled but still need to be painted and installed. For now, only one cabinet will go up, but more may be added later.
Bluetti Charger 1 (Alternator Charger)
This has been installed and it’s a game changer:
Charges the Apex 300 while driving (up to 550w, but limited to ~250-300w)
Helps offset cloudy days and long drives
Install was straightforward, with only minor van modifications
Cables are temporarily run across the floor; they’ll be cleaned up during final wiring
Coming in December...
With the furring strips nearly done, next up is furniture framing:
Bench seats, cabinets, and storage structures
Kitchen and desk will use butcher block countertops
I’ll be winging most of this, so it may take a while
Also on the way:
Webasto Heater: Hoping it arrives before an early December trip. Install will be time-consuming.
Dometic Fridge: Arrives Dec 1, will be installed immediately (DC fuse block is already wired for it)
That’s it for this month. More soon!
PS: Keep an eye out sometime very soon for another build Short/Reel
The First Short Is Live
Tuesday, November 18th, 2025
For a while now, I’ve been planning to create both short and full-length content for YouTube, Instagram, and TikTok. The problem is… I’m a bit of a perfectionist when it comes to content — whether it’s photos or video.
I’ve been filming nearly every step of the van build, but here we are — four and a half months after buying the van — and I haven’t posted a single video. I originally wanted to wait until I had enough content to post consistently, but the truth is… I’m not sure I’ll ever feel like I have “enough” to do that. So, I finally sat down, edited the first short, and decided to just put it out there.
This is one of many shorts I plan to release over the next few months. There’s no official schedule (yet), but I’ll post as often as I can while juggling work, life, and the final stages of the van build. Once I’m on the road, things should be a bit more stable — right now, I’m all over the place without a real home base, which makes consistent editing tough.
Still, this is a start. You’ll find links to my Instagram and YouTube channel in the sidebar, where you can also watch the very first short.
Stay tuned for more short-form content, and, eventually, some long-form videos too.
November Project Update
Friday, November 7th, 2025
October was relatively productive. I knew going into the month that time would be limited — and I was right. My estimate of having around 12 hours available to work on the van ended up being pretty spot on. I made progress on several fronts, but didn’t quite finish everything I laid out in the October update.
Subfloor Completed
I finally took the time to glue down the subfloor using Liquid Nails, which should hold strong long-term. There are a few uneven spots I may come back to with screws to level things out, but for now, it’s solid and functional.
Solar Roof Wiring Passthrough
I ran the cables from the roof-mounted solar panels (installed earlier in the year) into the van using a solar entry puck from DIYVan. Since I’m running the panels in parallel, I had to run all six wires (two per panel) through the puck instead of combining them on the roof.
This process was honestly a bit of a pain — I accidentally drilled into one of the structural beams (the one thing you’re not supposed to do). Thankfully, it’s a small hole and shouldn’t pose long-term issues. That said, it will make ceiling install trickier later on, since the wires exit right where the ceiling strip is planned. I’ll deal with that problem when I get to it.
Starlink & Antenna Mounting + Cabling
I used the Starlink Mobility Mount I bought a few months ago, plus some new hardware, to secure the unit to the roof rack crossbars. The process went smoother than expected and feels pretty solid. I’ll double-check everything before hitting the road, but initial tests look good. The Starlink runs via a separately purchased USB-C cable.
I also installed multiple NMO mounts for antennas — some already fitted with antennas, others capped for future use. These were mounted using the same crossbar hardware as the Starlink, keeping everything uniform.
To route the cables inside, I used a 4-wire solar entry gland from DIYVan. This install went far better than my first attempt: I prepped the space, used a trash bag to catch debris, and had cleanup boxes inside and out. Highly recommend that method if you’re trying to avoid metal shavings in hard-to-reach spots.
Wiring
I’ve started running 14AWG and 16AWG marine-grade wiring for key 12V components. So far:
-
2x 100W USB-C ports for the driver’s side
-
2x USB-C ports for the passenger side
-
Future runs planned for the Maxxfan and ceiling lighting
I might need to order more wire to complete everything, but overall this part is going smoothly.
Crossnut Install & Furring Strip Update
Back in August, I said I was abandoning the idea of using crossnuts for furring strips. Well… I’ve changed my mind again. After trying other mounting methods, I realized the crossnuts are still the most reliable option for long-term stability.
I managed to install nearly all of them, minus a dozen or so for the upper sections. I ordered a different tool to help with the remaining installs.
Truthfully, the furring strips should not have taken 2+ months — this should be a 2–3 day job — but I really don’t want to mess this part up. These strips serve as the main support for walls, cabinets, and ceiling panels. I’ve already cut everything to size, so now it’s just a matter of drilling pilot holes and mounting them.
Power Station Arrival
The Apex 300 is finally here — the same unit I mentioned in a previous update. I’ll be pairing it with the D1 DC expansion module and a few other accessories. I’m still working through the setup, but I’ll write a separate deep-dive post soon. For now, just know this will be the heart of the electrical system, at least for the next several months. I’ll wire everything in the van to remain compatible with a future upgrade to a full custom power system. From the small bit of testing I've done, everything seems to work really well (and the solar works!).
What’s on the Horizon?
November won’t be any different in terms of availability — I’m estimating another ~12 hours of build time. Here’s what I’m hoping to get done (ambitious, I know):
-
Finish the furring strips
-
Install LVP flooring (already ordered)
-
Mount wall panels
-
Connect all wiring to a 12V fuse block powered by the Apex 300
We’ll see how much I actually get done, but things are starting to come together. Slowly but surely. Once December rolls around, I expect it a lot more progress due to the increased free time throughout the month.
Staying Cool: Portable AC
Friday, October 24th, 2025
A while back, I briefly mentioned the AC unit I chose for the van build. In this post, I want to go into more detail about what it is, why I chose it, the cost, and the pros and cons of using this specific setup.
The Unit
I went with the EcoFlow Wave 3 portable AC — a compact-ish, portable air conditioner that fits just barely between the front seats of the van. Is it small? Absolutely not. But is it small enough? Yes. And that was a tradeoff I was willing to make in order to fit more solar on the roof.
Most van builds use a rooftop-mounted AC unit. Those things are massive, and take up significant roof space. If I had gone that route, I would’ve lost the ability to mount one of my solar panels. For a van that relies on solar as a major power source, that wasn’t an option.
But… Why?
There are parts of the U.S. where you will run into heat that’s too much to handle. The Maxxfan and passive ventilation help, but let’s be honest — sometimes, that’s not enough.
The Wave 3 isn’t meant to keep the van ice cold, and I don’t plan to use it every day. It’s for the worst-case scenarios — the “this is unbearable” type days where I need something to at least take the edge off.
Power Consumption
The Wave 3 can be powered in two ways:
AC units in general use a lot of power. Most rooftop units pull around 1,000–1,500 watts. The Wave 3 runs between 400–850 watts depending on the mode. That’s still a heavy load for a van system, but manageable with a little planning.
The optional battery (which I haven’t purchased yet) offers 2–8 hours of runtime — but let’s be real, the 8-hour setting doesn’t do much in terms of cooling. My plan is to charge the battery at campsites or plug in at coffee shops whenever I can. That means this unit is best reserved for those blistering, emergency-level heat days.
Venting & Draining
Like all AC units, the Wave 3 needs to vent hot air out. I’m using a Terrawagen window vent, which makes this super easy: roll down the window, slide it in, roll the window back up. The intake and exhaust tubes twist right into place.
The tradeoff? The unit has to sit near the window to work. Right now, I keep it between the front seats — which works, but limits flexibility.
The condensation drain is another consideration. The drain hose plugs into the back and can be emptied at the push of a button. For now, I just drain into a water bottle. Eventually, I’ll route this to a gray water tank or outside the van. The unit needs to sit level to drain correctly. I found this out the hard way when I left it on the angled Promaster step — and it drained backwards into the van. Luckily, I caught it before the subfloor was installed.
Pros & Cons
Pros
-
Price: ~$800 for the unit, ~$649 for the battery — far cheaper than rooftop units that cost $1,500–$2,500+
-
Flexibility: Use multiple batteries, swap them out as needed
-
No battery required: Can run fully plugged in
-
Smart controls: Use the app to adjust temp and settings without touching the unit
Cons
-
Power draw: Even at the lowest setting, it draws serious wattage. Expect 600W average while running
-
Size: It’s not tiny — and it takes up precious garage storage space
-
Weight: At ~33 lbs, it’s portable but not exactly fun to lug around
-
Placement limitations: Needs to be near the window vent, so it may not reach your bed easily at night
Final Thoughts
So that’s the unit. Whether it’s worth it long-term, or whether I’ll end up replacing it down the road, is still TBD. For now, I’m glad to have it as an option — even if it’s just for those what-if days.
By the way... decent progress has been made on the van this month. Check back early November for the next project update!
New Pages: Build Progress and Parts List
Friday, October 17th, 2025
For those of you who aren't a huge fan of waiting for the monthly build update... I have just the thing for you.
I went ahead and added a build progress tracker to the website (found on the navigation menu). This tracker is linked directly to my to-do list app, which I very frequently update throughout the build. This will allow those of you who are curious how the build is going in real-time to be able to see just that.
I also recently added a parts list to the website, in case anyone would like to see the exact parts used throughout the build. This can also be found in the navigation bar.
That's all! See you next Friday!
October Project Update
Friday, October 3rd, 2025
This project update covers everything completed between September 1st and September 30th.
I was out of the country for half the month — traveling through Canada, Iceland, and England — but progress didn’t stop completely while I was gone. I left the van with a friend, who was able to knock out a few key tasks:
-
Installed the 30A shore power plug
-
Ripped down 2.5-inch furring strips from a 4’x8’ sheet of 1/2” Baltic birch
-
Attempted to fix the subfloor warping issue (unfortunately unsuccessful)
Once I got back, I tackled the subfloor issue myself. The warped middle panel (right side) had to go. I cut a large section off and replaced it with two custom-cut spare pieces. It’s not the prettiest fix — but it worked.
After that, I pulled 4 of the 5 subfloor boards and applied Thompson Water Seal to each one. I let them dry for 4–5 hours before reinstalling. While they dried, I started working on the upper furring strips, but didn’t get very far before calling it a night. The following week, I sealed the final subfloor board using the same method.
I started prepping the solar cable entry, but quickly realized I was missing the solar extension cables I needed to actually route them into the van. Those are now ordered and should arrive the first week of October.
What's the plan for October?
Honestly, expectations are low. October will be incredibly busy, and I’m realistically expecting to only have about 12 hours total to work on the van this month. That said, here’s what I hope to accomplish:
- Glue down the subfloor
- Route the solar cables via the solar entry gland once the extension cables arrive
- Starlink Mounting/Cable Passthrough
- Antenna Mounting/Cable Passthrough
- Make progress on the furring strips
- Once the strips are completed, apply more insulation using the spare 3M Thinsulate
- Begin routing wires for the maxxfan, lighting, etc to the rear of the van, as well as route empty wires to expected USB/accessory port locations
- Begin working on the bed platform (realistically, unlikely to happen this month)
- Once the bed platform is in, mount a small wiring box and route all wires into a DC fuse box.
The rest of the year will be hectic, but my goal is to have the van in a livable state by the end of December. Things are definitely behind schedule, but that’s not surprising given I’ve been working 90–120 hours per week just to fund this project.
Come December 1st, I’ll finally have more free time to catch up and finish whatever’s left. Like I mentioned last month, I’ve got some huge changes coming, and I’m beyond excited to finally share more once everything is official.
It’s kinda wild to think that just a year ago, this was nothing more than an idea... and now it’s finally starting to come to life.
Keep an eye out for more updates coming soon... see you then!
A Shift in Plans (and Budget)
Friday, September 26th, 2025
Over the past few weeks, a lot has changed. Some expected, some not. I won’t get too deep into the details right now, but my budget is smaller, and my timeline is shorter.
Originally, I had a more relaxed vision for the van build timeline. I was aiming for a slow-and-steady approach—build what I want, how I want, and invest in the premium components when the time felt right. But life threw a few curveballs, and that timeline just got a whole lot tighter.
Adjusting The Build
With the new budget, I’ve had to step back and take a hard look at which parts of the build are essential, and which can wait (or just aren't needed). A few of the bigger plans like pre-made cabinetry and an all-in-one power system, are being re-evaluated.
-
Cabinets: I was originally set on ordering pre-built cabinetry from Van Wife Components. But with pricing around $2,900 (not including the countertop), that’s incredibly difficult to justify. I’m currently exploring some DIY alternatives that could cut that cost down by 75–80%, with the added benefit of custom sizing and layout.
-
Power System: My original power plan was leaning heavily toward an all-in-one solution—something plug-and-play like Bluetti or EcoFlow. Now, I’m leaning back toward a more traditional DIY setup using Victron components, which gives me more flexibility over time and lets me scale the system as needed without blowing my entire budget up front.
What's Next?
While I’m not ready to throw out specific dates just yet, that’s mainly because things are still fluid—and could shift over the coming months. What I can say is that a big transition is on the horizon.
The next few weeks will be focused on building out the core systems, making some smart compromises, and laying the groundwork for something much bigger. It won’t all be finished at once—it may not be pretty, but it'll be functional. I’m excited to share what’s coming when the time is right.
Stay tuned!
October Project Update will be posted on October 3rd
September Project Update
Friday, September 5th, 2025
August has been a weird month. Productive in some ways, slow in others. With a major life transition coming up (more on that in a future post), I’ve been spending a lot of time rethinking priorities, budgeting smarter, and preparing for what might be a pretty big shift. Long story short: there's a possibility that full-time van life could begin as early as December 1st — but nothing is guaranteed yet.
For now, let’s take a look at what’s been done, and what’s coming next.
Recent Progress
Insulation (Main Panels Done)
The primary wall panels are now insulated with 3M Thinsulate. That covers the major surface areas, but not the corners, ceiling, or harder-to-reach gaps — those will be tackled later using leftover material once the rest of the interior is framed out. The roof and two specific wall sections will be drilled into later for roof components, so they’ll also be insulated at a later stage.
Exterior Flood Lighting
A set of exterior flood lights has been installed on the passenger side of the van. That’s the only side I plan to light for now — mostly to help with cooking or setting up camp at night — but I may add more lighting in the future depending on how things feel once I’m out on the road.
Solar Wiring (On Hold)
The solar panels are mounted, but I’ve decided to hold off on running wiring for now. I’ll be adding Starlink, antennas, and a few other rooftop components soon, and it makes more sense to do all the roof work in one go rather than drilling multiple times or redoing cable routes later.
Furring Strips (In Progress – Outsourced)
While I’m away on vacation at the end of August, a friend will be helping finish the furring strips on the walls and ceiling. Once that’s done, the van will be ready for paneling, electrical runs, and mounting permanent fixtures.
What’s Coming in September (Budget-Friendly Edition)
With vacation taking up most of the month’s budget, September’s build will focus on low-cost but high-impact progress:
- Flooring install.
- Initial bed frame/system.
- Basic storage benches and/or clothes rack.
These pieces will give the van more structure and livability, even if the final finishes and trim come later.
Wrapping Up
August brought progress, even if it didn’t all happen on camera or on schedule. September will be a lighter build month financially, but each small step still brings the van closer to being road-ready. Whether full-time van life happens this winter or stays on the horizon, it’s finally starting to feel real.
Stay tuned.
Updated Power Plan
Friday, August 15th, 2025
Since posting my planned power system, there have been several important updates and discoveries.
I won't repeat the previous planned power system, you can check out that post here if you want to read about it. Since posting, Bluetti Power released their Apex 300 power station. This is a massive improvement over previous portable power stations, with the possibility for integrated MPPT solar charging, DC power expansion, and more - for a fraction of the price of other stations.
What does this mean for the van?
The van will have a hybrid power setup. All AC/120v power will run through the Apex 300. All devices that use a traditional wall outlet will plug into this device, or potentially extension cables running to outlets throughout the van. For DC power - the station will use the D1 expansion module, which allows DC power output to a DC fuse panel, which will power all lighting, the fridge (which I haven't posted about just yet), the Maxxfan, and several 12v USB-C ports throughout the van for phone/laptop charging. The power station allows AC/Inverter shutoff to save power when you're not using any AC outlets.
This is a major change from the previously planned power system with a dedicated 3000w inverter and all of the cabling required. All DC components will still be hardwired, but AC won't have to be.
What about the capacity?
The power station has an inverter output of 3,500 watts (roughly), and allows shore power, as well as solar input. The base power station is 2.8k watt hours, with expansion modules available at 2.7k watt hours each. Initially, I'll buy the station and 1 expansion, with future expansion up to 4 modules for a total of ~14k watt hours (the bank supports up to 6 expansions (19.5k wh), but this would take up a lot of space, be extremely heavy, and very expensive).
An important note: The actual power consumption will always remain around the same amount, the total power capacity is what I'll be looking to expand in the future. This only helps in situations with lower/no solar input, or longer periods without shore power. To give you an idea, with my expected power usage, a 5.5k watt hour setup (which will be the initial) will run around a day and a half without solar or any charge. It can run around 3 days with expected solar input. For the ~14k setup, those numbers are over double. In reality, I'll have shore power at least twice a week to fully recharge the battery. Additional accessories can be added later to expand solar input for portable solar panels.
The Cost
The Apex 300 is very reasonable priced for the punch it packs. It's priced at $1,300, with expansion modules listed at the same price. Building a 900ah power system would cost around $6,000 on a traditional battery+inverter setup. This setup with around the same capacity will sit at around $5,500 - with the ability to work up to that amount (starting at the base price of $1,300 + $400 (D1 module), and expand additional options later.
August Project Update
Friday, August 1st, 2025
July hasn’t exactly been the most productive month for the van build — and the blame mostly falls on the weather. With daily temps regularly hitting 90–100°F, working inside a metal box on wheels has been rough. That said, van builds are fluid by nature. Plans change, timelines shift, and ideas evolve — and this past month has been a great reminder of that.
Here’s what’s actually gotten done — and what’s coming next.
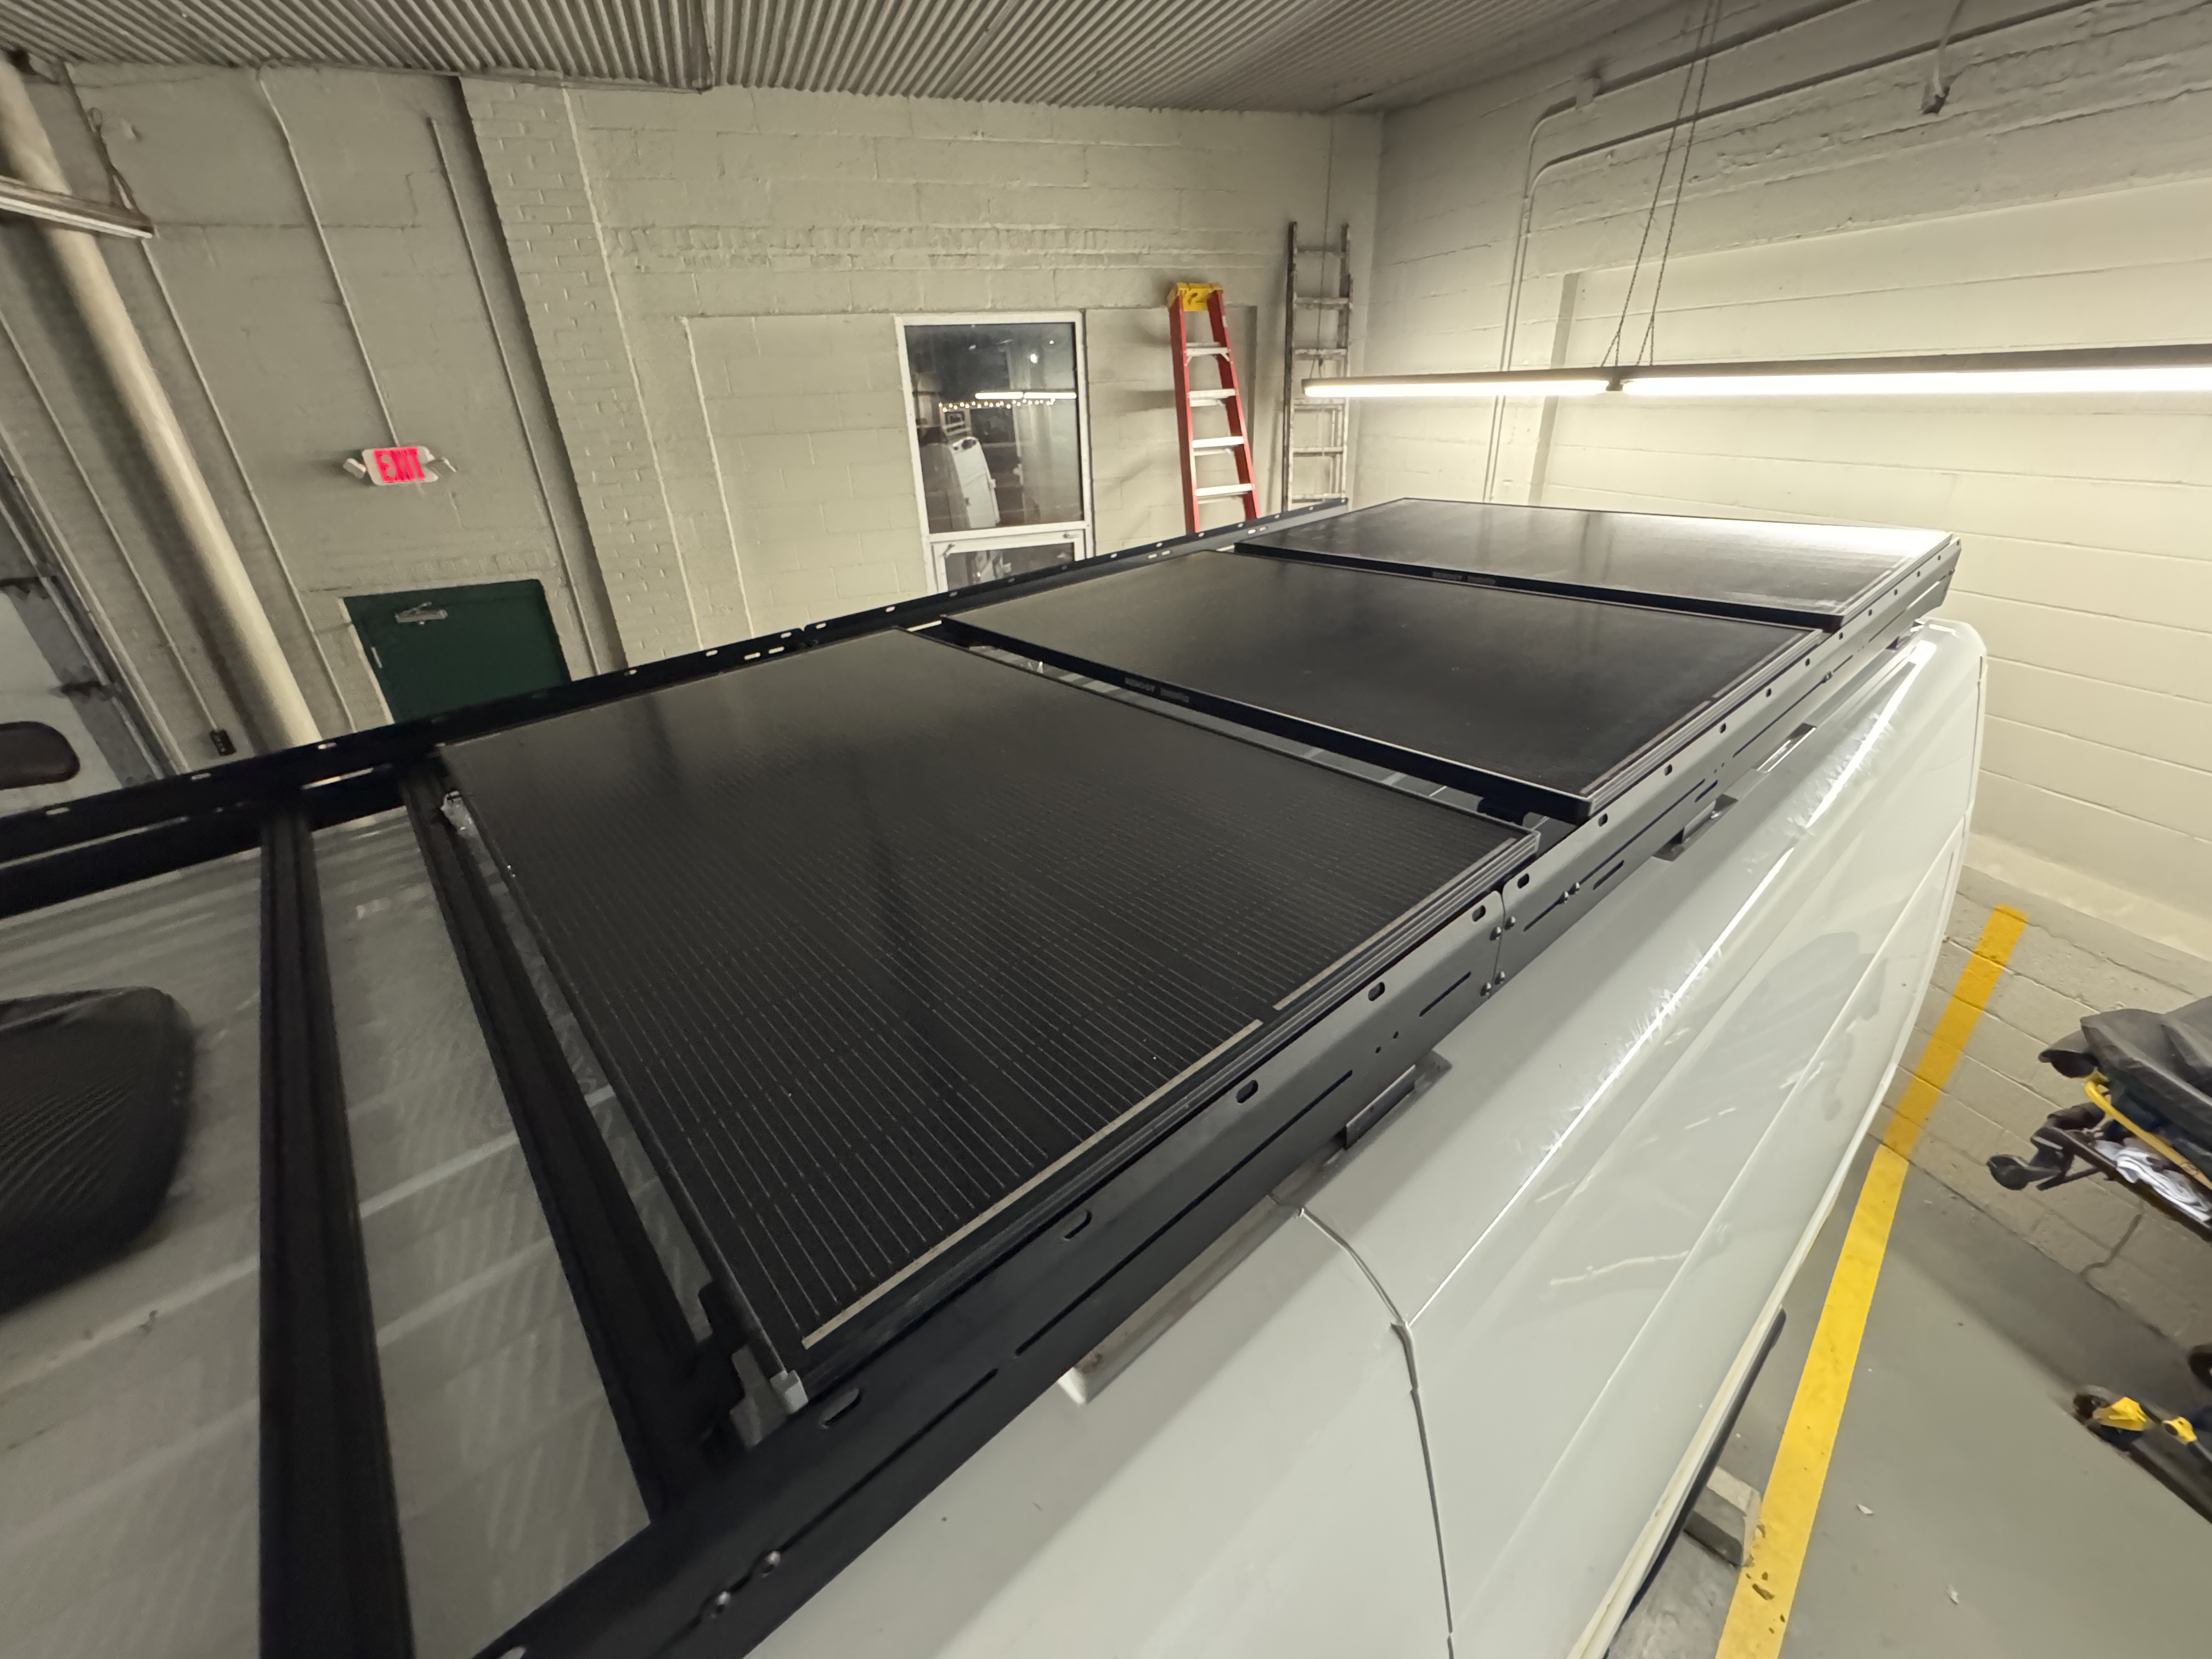
Roof Rack & Solar Panels
The roof rack install is finally underway. I mounted the front wind fairing and a rear crossbar earlier this month, and since then, the solar panels have been mounted to the rack — a huge milestone. I haven’t had the chance to run the wiring through the roof yet (waiting on the new solar entry gland), but that’ll be a project for next week. Once that’s in, the system can start taking shape.
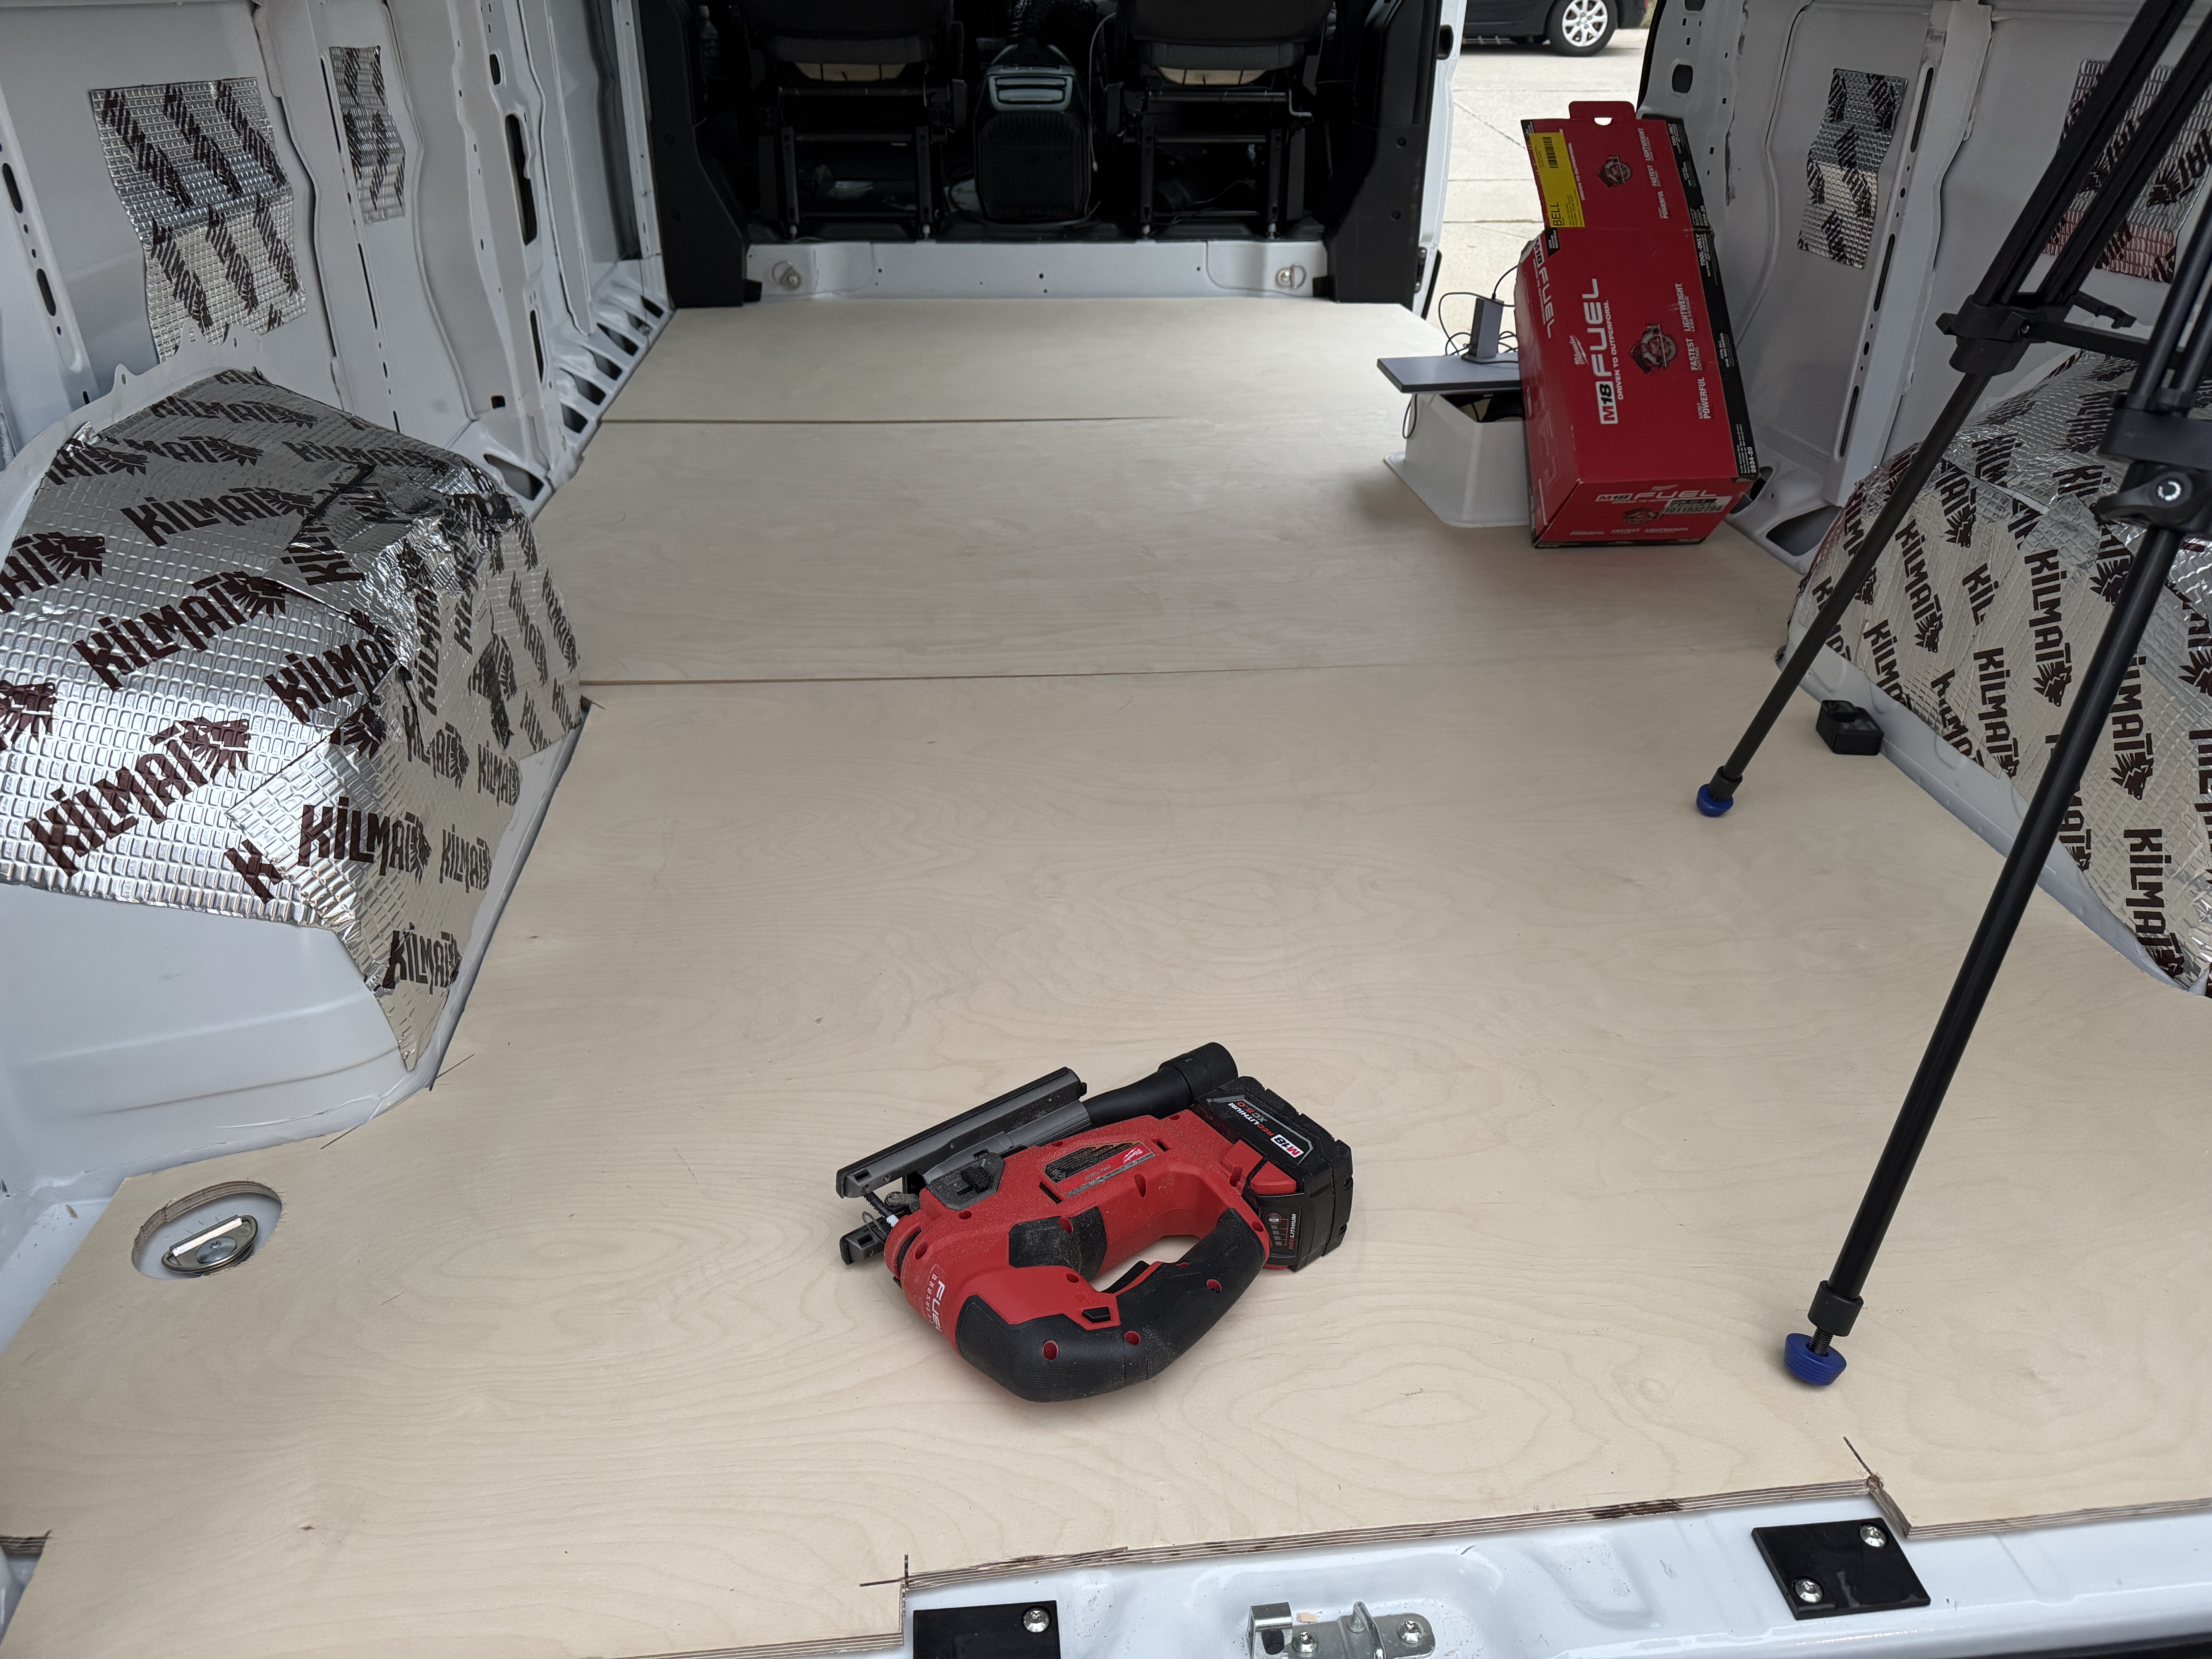
Kilmat Sound Deadening
This part was straightforward. I installed Kilmat sound-deadening panels throughout the van to reduce road noise and eliminate metal-on-metal rattling. It’s a small step that goes a long way toward making the van more livable, especially once everything is built on top.
Rivnuts/Crossnuts (aka Threaded Inserts)
Originally, I planned to use threaded inserts to mount furring strips and other components to the van’s frame without drilling directly into the metal. But after multiple issues with the install tool — and the time it was going to take — I decided it just wasn’t worth the effort. I’ll be moving forward with more traditional mounting methods instead.
AC Unit Installed
I picked up the EcoFlow Wave 3 — a portable AC unit that can both cool and heat — and added a window adapter to vent the hot air out. While this setup isn’t permanent, it’s made the brutal summer afternoons a little more bearable while working inside the van.
Subfloor Progress
The subfloor is mostly finished. The 3 panels are down, and next week I’ll be cutting out holes to expose the OEM cargo tie-down mounts. I plan to keep these functional in the final layout for flexibility and added utility. For the subfloor I used (3) 4'x8' sheets of 1/2 inch baltic birch, cut to size. I was able to use the included rubber mat from the van to trace the edges and curves of the van, to cut them with a jigsaw (which I had to go out and buy for this project). I don't plan to mount these anywhere.. baltic birch is heavy already, but I'm expecting most of the furniture and other items I'll be installing will hold this subfloor down well enough. Absolute worst case, I may glue it down. I'll make that decision once the cargo tie-down holes are cut, which will give me a good idea of how flat the subfloor will be.
What’s Next (August Goals)
If the weather holds (and unfortunately, it probably will), August is shaping up to be another scorcher. Progress may be slower than I’d like, but here’s what I’m aiming to complete:
- Insulation: The 3M Thinsulate is here and ready to go. It’ll be installed on the walls and ceiling to help with both temperature and sound control.
- Furring Strips: Now that the subfloor is nearly wrapped up, I’ll be working on the wall and ceiling furring strips. These will form the foundation for future wall panels, cabinets, and electrical mounting points.
- Solar Wiring: With the panels mounted, the next step is cutting into the roof and wiring everything to the power system. Once the gland arrives and weather cooperates, I’ll get this wired up.
- Power System Redesign: I’ll go into more detail soon, but the electrical setup has completely changed. I’m now going with a hybrid system: part hard-wired, part portable power station. It’s the best of both worlds — permanent infrastructure where it counts, with flexibility to disconnect or move things around when needed.
Coming Soon
I’ll post another full build update in early September, with smaller updates along the way. Things are moving a little slower than planned, but that’s just how van builds go — especially in the middle of a Midwest summer.
Stay tuned.
Public GPS/Tracking Plan
Friday, July 18th, 2025
For increased security (and a private tracking page — see below) the van will incorporate a fully custom GPS tracker. This GPS tracker will use a redundant internet and power source, in case of any network or power outages.
This GPS is not only for security, but I’ll also be building a tracking page that will allow the public to track where the van has been. This page won’t show the exact GPS location, but a list of cities the van has driven through, as well as the city/town it’s currently in. There will obviously be exceptions to this… the page will be disabled automatically when the van is within 50 miles of home, and won’t show any towns/cities under a certain population, for obvious reasons.
This page will be available to the public starting January 1st, 2026.
The Roof Rack
Friday, July 11th, 2025
Hello there, before I dive into the route I decided to take and why, let's first talk about what a roof rack is, for those who don't know.
Roof racks are essentially large pieces of metal that mount directly to the roof of a vehicle (in this case a van), which items can be mounted directly onto. This adds stability, looks better, and in some cases increases available roof space.
The Ram Promaster has several available roof rack options by a handful of vendors. They all function and look similar, but come at different price points and may include different materials. The most common roof rack brands found in VanLife specific builds are Flatline Van Co, Orion Van Gear, and Unaka Gear Co. All of these run about $2,000-2,500 for most models. With roof racks, you get what you pay for, and when you're mounting hundreds or even thousands in equipment and components up top, you want to make sure you're getting quality materials that will stand the test of time.
In my case, I fought myself for several weeks on whether or not I wanted to spend that kind of money on a roof rack. It came to a point where I was only days away from the first build day and I had to make a decision. I ultimately decided to bite the bullet and spend the money. Why? Fewer holes, more mounting flexibility.
The roof rack itself mounts directly to mounting points already on the van. There are no holes/drilling required to install the rack. If you compare this to mounting items individually, each item may require several holes. The problem? More opportunity for leaks. The second issue, mounting options. The Promaster (and nearly every other van) is not level/flat. A roof rack provides a platform that evens out the curve of the van, which creates a flat surface to work with and mount equipment to.
That flat surface makes a huge difference when you’re trying to securely mount solar panels, a fan, Starlink, lighting, or even a roof deck. Without a rack, each install is more complex, and more importantly requires sealing a dozen different spots with questionable long term durability. With the rack, everything is centralized, solid, and, frankly, cleaner-looking.
I ended up going with the Flatline Van Co rack. Reviews are solid, it's made from lightweight aluminum, and comes with integrated crossbars that simplify mounting without needing extra brackets. I was also a fan of the modular approach, they make it easy to add accessories later if I want to upgrade lighting or add a decking platform up top. From the looks of it, all 3 of the brands mentioned are reputable, and seem well built/high quality.
What's being mounted on the rack?
- Solar Panels
- Roof Deck (sort of, more on this in another post)
- Starlink
- Antennas
- Awning (future post)
July Project Update
Friday, July 4th, 2025
Build Day 1
Day 1 kicked off with a 45-minute drive to a friend’s house — he had some of the tools I needed to get things rolling. The two main tasks for the day were installing the roof rack and the Maxxair fan. We didn’t really know how long either would take, but we had about 5–6 hours to work with before I had to head home. Oh, and it was 95 degrees out. With humidity. Not ideal.
We started with the fan. After tracing and cutting the roof opening, we test-fitted the flange and built a wooden support frame to go inside the van. While the glue for that frame dried, we turned our attention to the roof rack. I’ll go into more detail about the rack in a separate post, but we managed to get the four side panels installed and secured.
That took maybe 20 minutes. Then it was back to the fan. We laid down butyl tape, stuck the flange into the roof, applied liquid nails to the wood frame underneath, and drilled the frame into the flange. Normally, you’d clamp the frame to the roof and wait for it to dry before attaching everything — but with two people, one of us held it in place while the other drilled. We test-fit the fan itself and it looked solid. The next step was sealing everything with self-leveling sealant, but since that stuff takes 12–24 hours to dry, we held off until the next morning.
Back on the roof rack — we hit a snag. One of the bolts in the side panel base sheared off. No spares were included, so the rest of the install (especially the front crossbars) had to be paused until I could get a replacement. The rear crossbars would have to wait too.
Day 1 (and a half)
The next morning, I sealed the flange and screws with self-leveling sealant and let it cure for 24 hours. I also reached out to Flatline Van Co about the sheared bolt, and their customer service was great — they shipped a full set of replacement parts without any hassle. I decided to hold off on the crossbars until those arrived.
What’s Next
The replacement parts came in on July 2nd (about a week after the above). I’ll likely wrap up the roof rack install in the next week or so.
I’m currently debating whether to hire a pro for the solar panel install. I’d feel a bit better having someone experienced handle the roof passthroughs for both the solar wiring and Starlink — I don’t want to mess those up. So for now, I’m holding off on solar.
In other news: I picked up three new tools — a Milwaukee drill/driver set and a circular saw. The set came with high-capacity batteries that also work with the saw, so it’s a great starting setup. I’ll still need more tools, but it’s progress.
I also placed an order for building materials, including smaller 20”x30” Baltic Birch sheets to cut into furring strips. Not sure when they’ll arrive, but once they do, I’ll begin work on the furring strips. Once that's done, onto insulation and subfloor.
On a fun note: I tested the fan and external lighting with power hooked up. The fan kicked on instantly — super cool to see it come alive for the first time.
I’ve got a flight in August and I’m hoping to camp in the van the night before at the airport. That means I need the insulation, flooring, walls, ceiling, bed frame, and power system finished by then. It’s a stretch — but fingers crossed.
PS: Out of curiosity, I got a quote for a full wrap to change the van color. The first company quoted $7,500. Yeah. I was expecting $4–5k, which is already steep, but that was next level. I’ll keep shopping around and see if anyone’s more reasonable.
Next week we dive into the roof rack.
Planned Water System
Friday, June 20th, 2025
Similar to the power system, I’ll have an “internal” water system, as well as a portable water station. The van will have a sink which will require a fresh water tank, as well as a gray water tank. The size of these tanks are TBD.
Some van builds include built in showers. I've decided I don’t want to use up precious space on a built in shower that I might use once or twice a week (at most). In any instance where you’re near a truck stop or gym, you have access to a shower. If I’m back home or at work, I have access to a shower.
The solution to this problem will be a portable water/shower system. Rinse Kit makes both portable rinse/shower stations, as well as a water heating unit that works with the Rinse Kit. Both of these will cost around $550 (total), but requires a lot less maintenance and is dead simple compared to building a water system. These are also portable, and can be taken outside of the van as they’re powered with internal batteries. I’ll look into building a pop-up in-van shower system, if I’m unable to find another shower. I’ll also buy some magnetic tarps to create a private shower in the rear of the van while camping. Van Wife Components sells something like this.
As always, plans may change in the future once the build starts, it will all depend on available space, budget, and other limitations.
Website Overhaul
Sunday, June 15th, 2025
This post contains personal/private information and requires the extended access key. If you have this key, enter it on the right-hand side of the screen (PC) or at the bottom of the screen (mobile). Thank you!
Planned Power System
Friday, June 13th, 2025
Power is going to be a major focus for this build because of the number of devices I plan to run. The van will be outfitted with 600–800 watts of solar panels and (2–3) 300Ah batteries, which can also be charged through shore power.
I won’t be using alternator charging — some van builds do, but I’ve decided against it to keep the living space fully independent from the van’s drivetrain and electrical systems. The goal is a system that’s self-contained and built to last long-term.
The internal power system will run the fridge, AC unit, Maxxair fan, Starlink, a hotspot, and a 24/7 microcomputer that handles GPS tracking (more on that in a future post). It’ll also power a gaming PC and either an Xbox or PS5, though those will stay fully off when not in use.
While I’m still finalizing the exact specs for everything, I’ll be using a 2000W–3000W inverter for AC power, a solar charge controller that can handle the panel array, and all the other necessary components to tie it all together. Power usage will be carefully managed, especially with high-draw devices like the AC and gaming setup.
June Project Update
Friday, June 6th, 2025
We’re about two weeks into owning the Promaster now. I’m beyond excited to dive into the build, but it’ll still be a few more weeks before anything major starts taking shape. Since picking up the van, I’ve already placed a bunch of orders for Phase 1 — the MaxxAir fan, solar panels, Starlink, and a few other roof components are either already here or on the way.
Once everything for the roof and exterior shows up, I’ll start tackling the installs. I also reached out to a van builder near Chicago to get a sense of labor pricing for some of the stuff I’m either not confident handling myself or won’t have the time/resources to take on. They’ll likely be installing one or more windows around late June or early July.
So what’s the plan for the next 2–3 months?
I’m heading out of the country for vacation at the end of August, but I also have a weekend in August where I’ll need the van in a usable state. It doesn’t have to be fully finished or fancy — it just needs to be functional enough for that trip. After I get back from vacation, I’ll probably have to hit pause on the build for a few weeks due to missing work and catching back up. Until then, build days will be pretty limited, but I’ll keep posting updates here whenever there’s progress worth sharing.
I'll detail more in the Phase 2 or 3 post, but I've also decided on a few high quality pre-built cabinets. This will speed up the build significantly. I'd like to have the build finished by October of this year.
P.S. I’ve set up a YouTube channel for the van build, but I probably won’t post much there until I’m deeper into the project. Updates will be few and far between early on, but I’ll share videos here once there’s some solid progress to show.
Next week I’ll dive into the planned power system for the build. Until then :waves:
Build Plan: Phase 1
Friday, May 30th, 2025
Unfortunately I’ll be limited to so many days per month I’ll be able to work on the van. This is due to my work schedule, as well as aligning my schedule with the person that will be assisting with the build. Some portions of the build I can do solo, but a majority will require 2 people. I’ve broken the build plan down into 4 phases:
- Phase 1: Outer Components & Insulation
- Phase 2: Core Build (Framing, materials, etc)
- Phase 3: Road Ready (Bed, appliances, etc)
- Phase 4: Build Completion
Each part of the build process will be posted as its own post, with a lot more detail than one large post.
Phase 1 (Outer Components & Insulation)
Expected duration: 3 build days
This phase is dedicated to components that are attached to the shell of the vehicle. These are all done at the same time so the wires can be run into the vehicle prior to insulation and the inner shell. Many of these components, with the exception of the Maxxair Fan, will only take 10–20 minutes each to install. The fan and solar panels will take a majority of the time. This includes the following:
- Roof mounted spotlight:
This spotlight will be used when locating a camping spot at night. The controller for the spotlight will be in the cab of the van.
- Exterior lighting:
- Scene Lights (side/rear mounted scene lighting for night use)
- Maxxair Fan
- Solar Panels
- Extra Antennas:
Several extra antennas will be installed for CB radios, HAM radios, scanners, and GPS.
Future posts will detail Phase 2 and beyond. I don’t expect to begin Phase 2 until July 1st or later.
Chapter 1: No Turning Back
Sunday, May 25th, 2025
The morning of Thursday, May 22nd, I got a text from the dealership I’d been talking to for a couple days. They said everything had been approved on their end and wanted to talk numbers. We negotiated — not much, but enough — crunched some numbers, I made the deposit, and that was that.
A day later, I drove up to the lot (about an hour away), walked in with a hoodie, some cash, and a dream… and drove out with 3,500 pounds of steel and a payment plan. Close enough, right?
What did I end up with?
A brand new 2024 Ram ProMaster 159" High Roof — the exact model I’d been chasing for months. Honestly? I didn’t expect to go the new route. I spent weeks combing through sketchy used listings, trying to find a trustworthy dealer with a clean, low-mileage van. Nothing felt right.
Eventually, peace of mind won. This van came with zero miles… ish, zero question marks, and zero compromises. It might not be perfect — no van is — but if something breaks, at least I’ll know I’m the one who broke it.
What’s next?
The exterior.
Solar panels. Maxxair fan. Antennas. Flood lights. Anything that needs a hole? It’s going on first.
Once those are mounted and sealed, the real build begins.
Phase I plans will be in an upcoming post, but the goal is simple: build smart, build clean, and build for the long haul.
This was a huge step toward something I’ve been dreaming about for years, but it’s still just the beginning. There’s no turning back now.
Planned Features
Friday, May 16th, 2025
First off, design. The van will have a sleek, yet functional design. The attached photo is the design I’m going for. The exact design likely won’t be figured out until I purchase the van. I have a few ideas, but it’ll be hard to really visualize until I’m standing in the space.
The bed
The bed choice is a small detail but makes a huge difference on how much can fit in the van. At the end of the day, you have 3 options: Convertible couch, twin bed, or full size bed. The full size bed is most common, but takes up a ton of space. The twin size is 16 inches thinner than a full size, which in the case of a van build, every inch matters. I haven’t fully decided on which bed choice I’ll go with yet, it’ll come down to how many trips I plan to take another person on.
One of the key points to this van build is stealth. Solar panels will (hopefully) not go all the way to the edge. The maxxair fan can’t be hidden, nor can the Starlink, but the rest will be as stealthy as possible. If I’m able to travel full time, I plan to take the van stealth camping in cities quite often. Having a low profile van will be essential in making this work.
Below are a list of features I’d like to include in the van, sorted by must-have, first. I’ll go more in depth on a lot of these items in future posts.
Core
- Water/Plumbing System
- Internal Power System
- Starlink Mini & Hotspot
- Max Air Fan & AC
- Heater
- Hidden, Secured Safe
- Swivel Seats
- 24/7 Custom GPS tracking
Kitchen/Bathroom
- Sink
- Butcher block counter for cooking
- Cooktop
- Portable Toilet (emergency use only)
Office/Bedroom
- Bed (Size TBD)
- Desk large enough for 2 monitors
- Storage for a Gaming PC & console
- Hidden radio cabinet that can be opened/closed without a door in the way
- Radio Rack W/ Scanners & Radios, close enough to the desk to read the radios
- Radio speakers mounted facing the desk seat
Misc
- Bug Nets (rear and side door)
- Blackout Curtain between front seats and living space
Website Update
Sunday, May 11th, 2025
This post contains personal/private information and requires the extended access key. If you have this key, enter it on the right-hand side of the screen (PC) or at the bottom of the screen (mobile). Thank you!
May Project Update
Friday, May 9th, 2025
Since the last update, I’ve been approved for financing on a Ram Promaster — one of the final steps before I can kick off the build. Now it’s just a matter of finding the right van. I’m looking for a 159” model with low mileage, clean history, and no major red flags. Easier said than done.
Because I’ll likely be buying out of state, coordinating a pre-purchase inspection and figuring out how to pick it up without spending a fortune on travel will be a challenge. Plane tickets and one-way rentals don’t really work when the timeline is uncertain.
I’m planning to wait until the end of May to put down a larger payment and reduce long-term costs — especially if full-time van life becomes the goal. The window for all this is tight, but I’m aiming to have it wrapped up soon.
This post was edited on 6/15/2025
Purchase goal moved from May 9th to May 30th.
Planned Internet Choice
Friday, April 25th, 2025
Planned Internet Choice
Internet will be an important component of the van build. There are 3 viable options. Weboost, Cellular Hotspot, and Starlink. Each option has its own set of pros and cons.
- Weboost is essentially a roof mounted antenna that boosts the cell signal inside the van. This has a larger up front cost, with no monthly cost (it’s only a signal booster, not its own service).
- Cell Hotspots are self explanatory, these are great for when you’re any decent sized town, but terrible for when you’re out in the country or national parks. The average cost for hardware is around $300, plus the monthly service fee around $30/mo.
- Starlink is the last option, this is great for open environments with a clear line of sight to the sky.
So, what am I going with?
A majority of my time will be spent at national parks for the first year until I’m able to go “full time” VanLife. I’ll need a reliable internet source for these short trips, without being tied down to an expensive monthly subscription. Until I go full time on the road, I’ll be using a Starlink Mini with the Roam package. This is around $50/month, but you can pause your subscription when you’re not using it. There’s a low data limit, however with even a small amount of planning you can avoid overages (such as downloading movies prior to the trip, avoiding TikTok/YouTube, etc). The internet choice will have to be re-evaluated when I’m able to go full time on the road.
Purchase goal moved from April 28th to May 9th. Build goal moved from July 2025 to August 2025.
April Project Update
Friday, April 4th, 2025
April is shaping up to be a big month for this project.
Behind the scenes, a lot of groundwork has been laid to prepare for the vehicle purchase and financing. I’ll be sitting down with a local credit union soon to explore loan options. Since I’m financing a commercial vehicle through a personal loan, it’s a bit of a gray area — but I’m hopeful things will move forward smoothly.
Once financing is confirmed, the search begins. I’m expecting to cast a wide net to find the right Promaster — ideally something with good mileage, clean history, and a fair price.
On the financial side, savings are steadily growing and I’m getting closer to the goal. The van is within reach now — and if all goes according to plan, May’s update will include some exciting news.
I'll post again here very soon! The purchase date is still on track for April 28th, with the estimated build completion in July...
The Van Type
Friday, March 14th, 2025
When it comes to VanLife “Nomads”, there are tons of different options for vans out there. Between the makes, models, sizes, used/new, and much more. For the sake of this post, I’ll mention the 3 most common here in a few. There are other types, including some old VW vans, a school bus, city models, etc, however those wouldn’t work for a few reasons. The first is the age of the vehicle, and my lack of mechanic skills. Most of these vehicles are older, sometimes 20-30+ years old. And while they look really cool, and would probably be a blast to use for VanLife, they’re not practical for my specific needs. These vehicles are prone to mechanical issues, and while some may not be a big deal, fatal issues could cause serious headaches and stress when you’re alone, 2,000 miles from home. That’s not to say modern vehicles won’t be, but getting someone to work on older vehicles may be more difficult.
So that brings me to the 3 most common vehicle types for VanLife in 2025. The Ford Transit, Ram Promaster, and Mercedes Sprinter.
The Transit comes in a few sizes, but tends to max out at 148”. The actual build length inside is shorter, and the top is more of a curve.
The Ram Promaster has 3 main size options, 136”, 159”, and 159” EWB. This vehicle is more of a box-y layout, which makes it much easier to build in.
Lastly, the Mercedes Sprinter. This has 2 size options, 144” and 170”. Similar to the transit, these are more rounded. The sprinter is slightly more narrow, and sits higher off the ground.
Both the transit and the Promaster come in around $50,000 for a brand new model. The sprinter sits somewhere around $65,000. The sprinter also has higher maintenance costs, just due to it being a Mercedes. This leaves the Transit and Promaster as viable options. Both are around the same price, similar in build volume, and have (about) the same reputation as far as reliability.
I’ve ultimately decided to go for a Ram Promaster 159” (non extended). The extended would have more build volume, but wouldn’t fit into a standard parking spot. So, why the promaster? The price, and box-y inside. The price is a big factor, as this will already be an incredibly expensive project. The inside being more of a rectangle will make it a lot easier to build in, when I already have very little experience building anything like this. I’ll be searching for a used promaster with between 10-30k miles. I’m expecting the price to fall between $28-33k, likely on the higher end.

March Project Update
Wednesday, March 5th, 2025
The past few weeks have been full of long shifts and late nights. I’ve been working 70 -100 hours a week to push this project forward. Every bit of that effort is going straight toward one goal: getting the van on the road.
The original plan was to make the purchase in late March, but with how things are shaping up, it’s looking more like April... or maybe even early May. The timeline might be shifting slightly, but the goal hasn’t changed. Each week brings me one step closer.
For those following along, I’ll be launching a YouTube channel once the build process officially begins. As the purchase date gets closer, expect more frequent updates and details about the van’s layout and features. Until then *salutes*.
Summary not available.
Life Happened
Friday, January 3rd, 2025
Since the last post, the plan has changed. VanLife is still very much in the works, however personal financial goals must be met first. The first goal is paying off my car, which I’ve been working towards. The completion estimate for this is the end of January (Jan 31st). Once this is done, every penny will go towards the down payment for the van.
I’ll be looking for a used van between 20-50k miles, between $25-35k. My preference will be a black van, however I’d be fine with white. I’ll make a future post with specific van features I’ll be looking for.
Initial purchase goal moved from February to March. Build goal moved from June to July.
September 2024 Update
Sunday, September 15th, 2024
It's been about a month and a half since I launched this webpage, so I figured I'd give a bit of an update as to how things are going so far.
I've second guessed myself several times, which is to be expected given the extensive work this project will take and all of the life changes it requires. I've told myself that when December rolls around, I'll see how much money I have, and where I stand in terms of the possibility of funding this lifestyle from the road, then I will, or will not pull the trigger.
I haven't fully decided on the van type yet, color, or specific features.. but I'm sure that decision will be made soon.
I'm still extremely pumped about this project. The idea of being able to travel freely, live in whatever state I feel like for the month, just seems like an exciting lifestyle to have, even if it's only temporary. Ideally, this will be something I can try for a year or two. By that point, I'd imagine I'll find a spot I'll want to settle down. Won't know until I try.
The Idea
Thursday, August 1st, 2024
I've lived in the same city for all my life, which after a while gets really, really old. After getting a taste of freedom the last 2 years, I finally decided it was time for a change. I'd pondered with the idea for a very long time of getting into the VanLife scene, but due to the initial investment cost, I'd never truly considered it a real possibility.
It took a lot of planning, and initial life changes to get the ball rolling, but I've decided to dive head-first and go for it. This webpage was built to track the progress of this project, from the initial concept to hitting the road. I'll post as frequently as I can, both financial updates, and design/build updates.
Welcome!
Post updated 5/11/24


